A Beginner’s Guide to Backyard Bird Photography
![]()
![]()
![]()
![]()
 Introduction
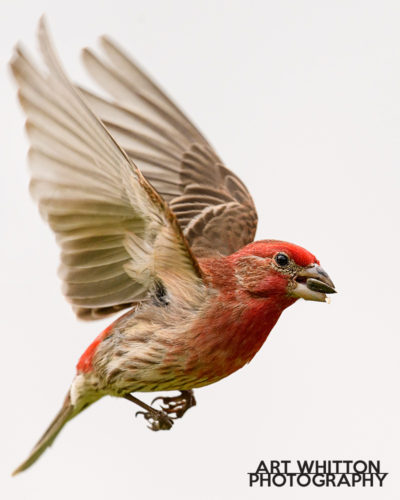
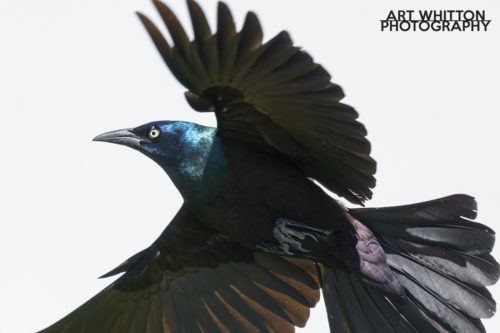
Bird watching and bird photography are two very popular hobbies around the world. I’ve found that getting a good photo of a bird is never easy, but takes a combination of skill, luck, timing and persistence. I’m not always the most patient photographer, but when it comes to shooting wildlife, I need to relax and let the shots come to me.
Almost everyone has birds in their backyard or a nearby park. The birds in your area may not be the most exotic, but if you watch long enough, you’ll find a wide range of species and some that might surprise you. I’ve been working on my backyard bird photography for a while and I challenge myself to get better each year. I try new techniques or use new gear, but I’m never satisfied.
This post will show you my approach to getting some fun, interesting bird shots without leaving my property.
What you need for Backyard Bird Photography
Here’s a list of a few things that you’ll want to have for easier, successful backyard bird photography. Remember, this is one approach that works for me and is not the only solution.
Bird Feeder – Give the birds a reason to visit.
Bird Bath – Important in cold climates during the winter
Camera with Telephoto Lens – You can’t get too close to your subject.
Shooting Blind – I use a car
Camera support – Sandbag, tripod or even a heavy jacket
Branches – for the birds to land on
![]()
![]()
![]()
![]()
 Choosing a Bird Feeder
I have a bird feeder with a divider down the middle so I can use two types of food to attract a wider range of birds. I live in rural Nebraska, so I have a lot of seasonal birds and some some stay year round. I use one side to fill with smaller seeds or sometimes black sunflower seeds, while the other side has a larger fruit and nut mix.
I have it on a shepherd’s hook in an open space in my backyard. This gives the birds a nice wide area to approach the feeder and have a clear lookout while eating. Under the feeder is lawn, which attracts more birds, like doves, which can’t land on the feeder.
Currently (Mid-May) I am filling this feeder every day. I don’t know how much the squirrels are getting, but I know the birds are there from dawn to dusk. Depending on your location, you may find that any feeder with any feed in it will attract a lot of birds, but if you’re going to take the time to photograph your visitors, why not try a few different types. Without a feeder, the birds may have no reason to visit your yard.
Camera with a Telephoto Lens
I’m not one to say that the gear is more important than the photographer, but when it comes to wildlife photography – gear is a big factor. You won’t be getting many keepers using a phone camera or other fully automatic camera. Ideally you’ll have a camera that lets you control shutter speed, aperture, ISO and focus. A telephoto lens in the range of 200mm or higher will help you stay back from the birds, while still getting them in the frame at a reasonable size.
![]()
![]()
![]()
![]()
 Shooting Blind
I know some people who will set up a full hunting blind in their backyard, and that’s a good approach. I’m happy sitting a car and pointing the camera out a window. Birds are used to seeing cars, especially yours, in the backyard. They may startle and fly off when you drive the car into position, but they’ll come back soon.
If you have a choice of vehicles, think about how high you want to be in relation to the bird feeder. If you have a tall truck, you might sit too high, while most cars will let you shoot up a little.
I won’t have the music playing or the AC on, just some nice peace and quiet while I watch and photograph the birds. If you don’t make sudden movements, the birds won’t know you’re there – but don’t hesitate to yell at the squirrels!
If you can’t get a car into your yard, you should be fine with a comfortable lawn chair and tripod. As long as you aren’t moving a lot or making noise, the birds will get used to you and ignore as you they get their lunch. You can also shoot from inside through a window, but you’ll need to be very careful about reflections.
You can avoid reflections by placing the lens hood right up to the window or using a polarizing filter.
Camera Support
As you are using a telephoto, steadiness is important. You also might be shooting in one position for a long time, so make sure you’re comfortable.
I like to use a beanbag as support, but you can use any type of support you feel comfortable with. Before I bought my beanbag, I used a folded over winter coat. This allows me to cushion and support the lens on top of the window glass.
Branches
The last item in the list is optional, but works really well for a more natural setting. You can put a metal stake in the ground near the feeder and attach a couple of branches to it. This gives the birds a nice place to land and pose for you. It’s a MUCH more natural setting than a bird feeder.
 Finding the Right Location and Angle

When picking a location for the feeder and your shooting position, you need to be aware of the background. Avoid clutter and unnatural colours. It’s very likely that you will be working with minimal depth of field, so your background will be blurry. If you can place trees and foliage behind the feeder and not your neighbour’s red truck, you’ll be better off.
If you are scouting the best location, use your camera and frame the scenes. This can be done when setting up the feeder or when you are moving into position. I will have my camera on the sandbag in the window while driving towards to the blind and checking for the best background and angles.
In this photo of the blue jay (right), you can see a telephone pole runs vertically through the image, plus there is a large white highlight under the bird. Both of these are unnecessary distractions which could be easily fixed just by changing my angle.
Camera Settings for Backyard Bird Photography
This is one of the trickiest parts of the process. I like to shoot in bright daylight so I have the widest range of settings available, plus the bright daylight will show off the plumage better. A bright backlight can also create dynamic photos (but possibly underexpose the shadows).
White Balance
Set your white balance for Direct Sunlight or whichever setting is closest. This is the easy part. Since you should be shooting RAW, you can always adjust this later – but – if you shoot a lot photos, it can be tedious to adjust each one, so get your WB setting right the first time.
Camera Mode
I like to shoot in manual mode when shooting backyard birds. The main reason is that the background might change or be much different than the subject, which takes up a smaller area of the scene. If you rely on the camera, you might find that you’re exposing for the background more than the bird. Switch to manual and then find the best settings for the birds you have in your yard. Unless the light is changing constantly due to clouds, you should be able to set it and forget it.
Turn off Vibration Reduction or Image Stabilization. You will be using a fast shutter speed and your camera will be supported, so you don’t need the camera to try to ‘fix’ the camera shake which won’t be happening. In many cases, leaving it on will add blur to your images.
![]()
![]()
![]()
![]()
 Shutter Speed
This is a tough one, but I want to freeze the birds as much as I can. If I’m about 10-15 feet (3-5m) away, then they are moving very fast in relation to my camera. If you have read my lesson about shutter speed, then you’ll know that the closer you are to the subject, the higher the relative speed of your subject. Considering how fast birds are as well as their wings, you want a fast shutter speed.
I try to shoot at 1/2000s or faster. If you are shooting birds while they are stationary, then you can get by with a 1/800s or maybe even a little slower. Most of my bird in flight images are shot at 1/3200s or faster.
This is a good time to review the exposure triangle. Remember that your shutter speed setting will affect which aperture and ISO you need to select. Lately I’ve been using my 200-500 zoom lens for shooting birds and the widest aperture I can use is f/5.6. This gives me minimal depth of field, so my focus has no room for error.
![]()
![]()
![]()
![]()
 Aperture
Your shutter speed will dictate what range of aperture you use, but if you want a fast shutter speed, then you open up the aperture to compensate. Depending on your lens, you might be shooting wide open. With my 200-500 at f/5.6 I have about 1-2″ (2-4cm) of sharp focus. That means the if the bird is horizontal to the camera, his head can be focus, but not his wing.
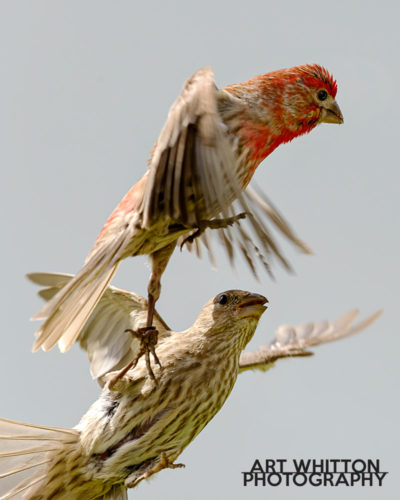
This photo at the right was shot at f/5.6 | 1/3200s | ISO 800 | 420mm and the posts are about 6 inches apart. I could have shot at a slower shutter as the birds weren’t moving, but wanted to show what minimal depth of field looks like.
If you’re not sure about how much depth of field you’ll be working with, try this DoF calculator and enter in your specific information.
ISO Setting
Your aperture will also be influenced by your ISO setting. Some cameras won’t give good results at higher ISOs, so do some test shots before shooting. I’ve found that 800 ISO works well on my D800e and I might try some higher settings.
With your camera in manual mode, start by setting your shutter speed, higher for in flight shots (about 1/2000s or faster), slower for stationary shots (1/400s or faster). Then set your aperture depending on the light you have – ignore the background. Take a bunch of test shots of the birds and see what works best. Fine tune with your ISO and you should soon have a setting you can leave your camera at. You might able to use your feeder as a test subject for metering.
I would not recommend to use Auto ISO as your background could be darker than the birds and cause the ISO to jump. If you do use it, cap the maximum ISO at a setting that will give you usable results.
Focus Mode
![]()
![]()
![]()
![]()
 For Birds in Flight
When I’m shooting these small backyard birds, I have very little luck if I’m trying to continually focus on them. After much trial and error (mostly error) I’ve found the best setting is manual pre-focus. What this means is that I’ll focus on my bird feeder and then turn the AF off.
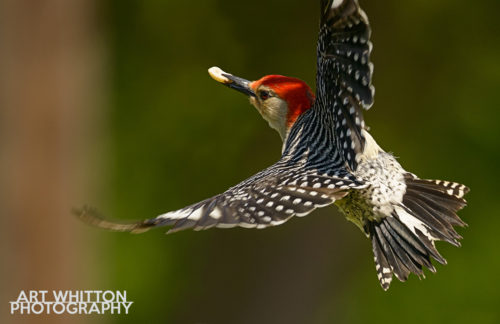
The problem with this method is that I will be only getting birds in focus that are flying in towards the feeder perpendicular to the camera. With enough birds at your feeder, you should be able to capture a number of flying birds at the right distance. But when it works, like the photo on the left, the results can be spectacular. Shoot a lot, be patient and start firing before the birds enter the frame.
You can try using autofocus for small birds in flight, and if you do, use Continuous focus and try to follow the bird as it flies up towards the feeder. Some cameras will be more successful at tracking a small fast object than others, so give it a try.
For Stationary Birds
If I’m shooting birds on a branch, post or on the feeder itself, then I’ll turn the AF back on and select a small area setting for autofocus. You want the camera to worry about just a small part of the bird – usually the head, and not focus on wings or tails. Just like human portraits, you want the eye in focus as people are naturally drawn to look at it.
![]()
![]()
![]()
![]()
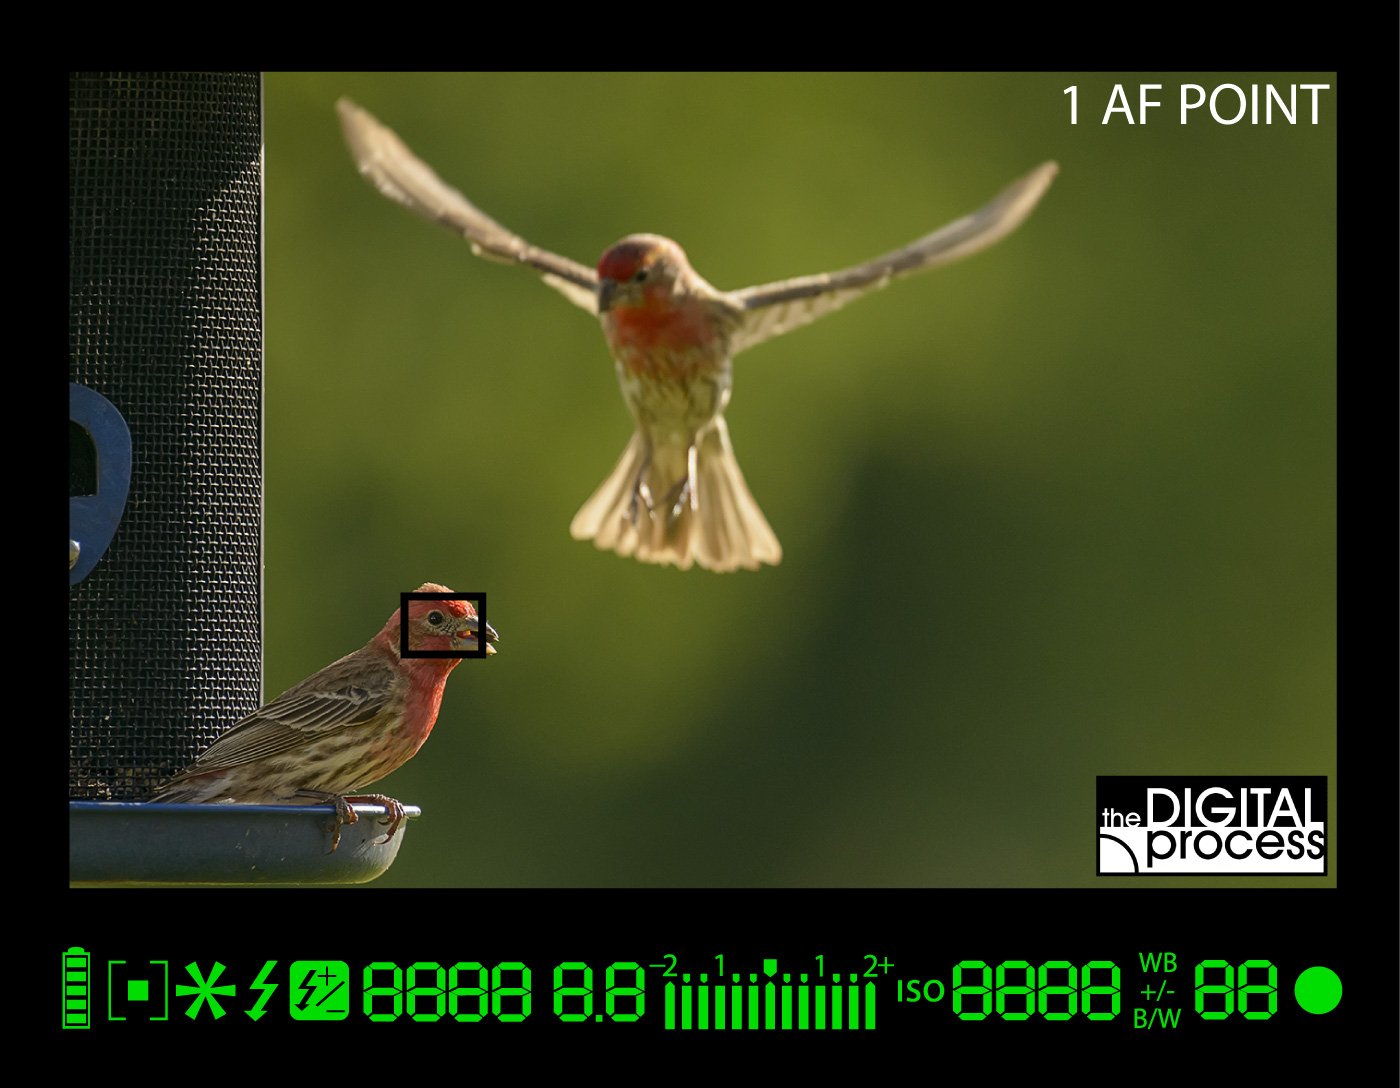
Keep your exposure settings on manual, but you need to be quick and move the single point around to get the correct part of the bird in focus. It’s tricky, but it’s great fun when you nail it!
You can try single shot or continuous AF, but if the bird is sitting fairly still, the single shot should work fine. The more you shoot, the more consistent you’ll get in your settings and your results.
Other Settings
Use your camera’s high speed continual shooting mode. Unless you have lightning fast reflexes, you’ll want to shoot a few frames for each bird. For stationary birds, this helps as you can pick the sharpest of a series. For birds in flight, you might get a few frames shot, but only one could be in focus.
Remember, if your camera is stable, turn the images stabilization off.
Remember to use Daylight White Balance.
Getting the Shots

I’m not usually one to advocate ‘spray and pray’ photography, but for wildlife, I’ll make an exception. Especially birds. Birds are fast and move quickly. They can turn and tilt their heads and this alone can make or break your shot. I will shoot a few hundred images in a short session of backyard birding.
If you are planning to shoot for more than ten minutes, get comfortable. There’s no point forcing yourself into an awkward position when you can relax and enjoy the experience.
![]()
![]()
![]()
![]()
 So you’ve got your camera settings just the way you want them after taking some test shots, you have your camera supported and you’re comfortable. If you are close to the birds, then pull your eye back from the viewfinder so you can see the overall scene and notice when birds are approaching. Try your best not to move your camera and check back often to make sure it’s pointing where you expect to be.
If you are looking through the viewfinder and press the shutter when you first notice a bird fly into the scene, you will more than likely miss the shot entirely. If you know where your camera is pointed and see the bird come in from a distance and into the frame, then you can start shooting before the bird enters the frame and fire off a series of shots. It’s all about predicting the flight path and, of course, luck and timing.
After shooting for a while, take a break and watch the birds. See if they use a similar approach path (like planes on a runway). I’ve found that in my set up, birds have about 4 or 5 spots to land and usually come from just 2 or 3 angles towards the feeder.
Review your photos
I like to review my photos on my computer screen. If I’m trying new settings, then I’ll make sure to look for things I can’t see on my camera screen. I’ll check for focus, grain, general exposure – and of course, to see if I have any keepers!
Use your review time to make any adjustments you need like shutter speed or ISO. Learn to look for the differences in blurry photos due to shutter speed or focus. An out of focus image will be soft on all sides, while blur due to movement will be usually be blurry in one direction.
Check your background for any distractions and change your angle of shooting or move the distracting object if possible.
Photographing Hummingbirds

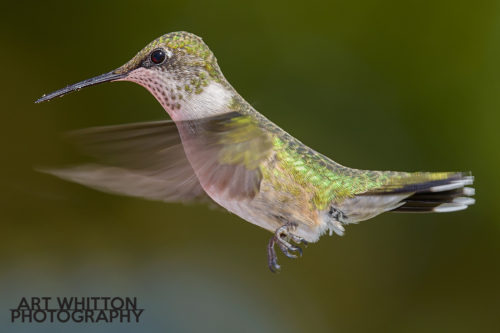
Most of these techniques will work well with hummingbirds, but I’ll suggest a couple of changes. First off, hummingbirds are generally smaller than other birds you’ll be shooting, so you want to get even closer – or get a longer telephoto. Also, hummingbirds can and will hover in one spot for a moment. This short time should allow you to use autofocus instead of manual focus. Another thing to try is an added flash. The duration of the flash is much shorter than your shutter speed, so the bright light may freeze the fast moving wings to the point where you get a blur of wings in the full exposure and a sharper section when the flash fired.
If you are lucky enough to have flowers which attract hummingbirds, then you can capture the flower and bird together. In my case, I need to use a hummingbird feeder (two actually) to get them in my yard. In Nebraska, we have very few species that come through during their fall migration, and not usually in great numbers. I might sit in my car with my camera pointed at the feeders and only see one every 20 to 30 minutes, so I need to make my shots count.
For the image to the right, I used autofocus (3D setting, continuous) while shooting at ISO 640, f/9, 1/400s at 500mm. I used a flash unit on the camera at either 1/1 or 1/2 power. Shooting from about 8 feet (2.5m) away gives me a nice blurred background.
Keep Shooting

If you enjoy your subject and shooting, keep working at it to improve. The more you shoot, the better your odds of catching that perfect shot! As I write this, I’m going out each morning and shooting for 20-30 minutes before breakfast while the day is a little cooler.
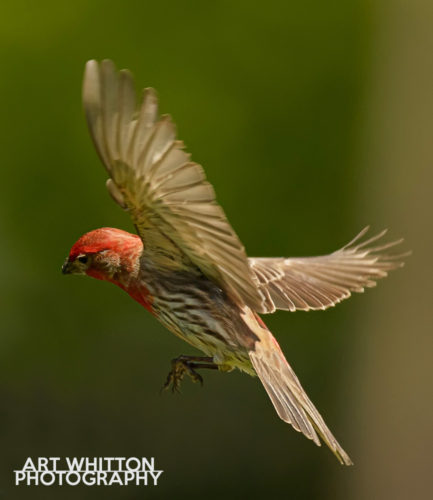
I’ve been doing this for a few years now and each year I want to surpass the quality of the previous year. The first year I didn’t get any BIF images, but had some nice shots of the birds perched on the branch (right) I mounted near the feeder. The following year I got one or two BIF images, but nothing very sharp. This year is the first I’ve had more than a handful of BIF keepers. And like any genre of photography, once it starts clicking, it gets addictive.
Try shooting at different times of day. You might find that morning gives you wonderful backlighting for the feathers, while evening gives a wonderful warm glow. The mid day sun can be harsh, but it’s also the brightest to allow you the widest range of settings. Look to see where the shadows fall during the day.
Editing the Photo
After shooting you will hopefully find some images you want to share, so get your editor out and crop the photos and make some adjustments. Here’s how I work on my bird photos in Photoshop. In this morning’s shoot (23 minutes), I ended up with 237 photos and found 3 that I wanted to edit further.
Conclusion
Like any kind of wildlife photography shooting birds in your backyard is a mix of preparation, skill, timing, luck and perseverance. You need to make sure you have your settings in your camera made for the type of shots your plan to take. Holding the camera steady and using your best photo techniques is needed as there is little room for error.
With today’s DLSRs you can shoot at 4-10 frames a second so your timing doesn’t have to be perfect, but you need to anticipate the shot and be ready when it presents itself.
The most important aspect of wildlife photography is patience. When you see a stunning photo of an exotic wild animal, you can be sure that there are days, weeks or months of planning and shooting behind the shot. Relax and enjoy your time with the birds. Listen to their songs, watch their interactions and see what you can learn about them. I can verify that 30 minutes sitting in a hot car watching birds is MUCH better than 30 minutes at my desk.
Enjoy – and if you have any questions, feel free to email me at info@TheDigitalProcess.com or leave a comment below. I’d love to see what you captured! Thanks for reading – Art.
Here is a gallery of some of my shots from 2017 (so far).
- 0
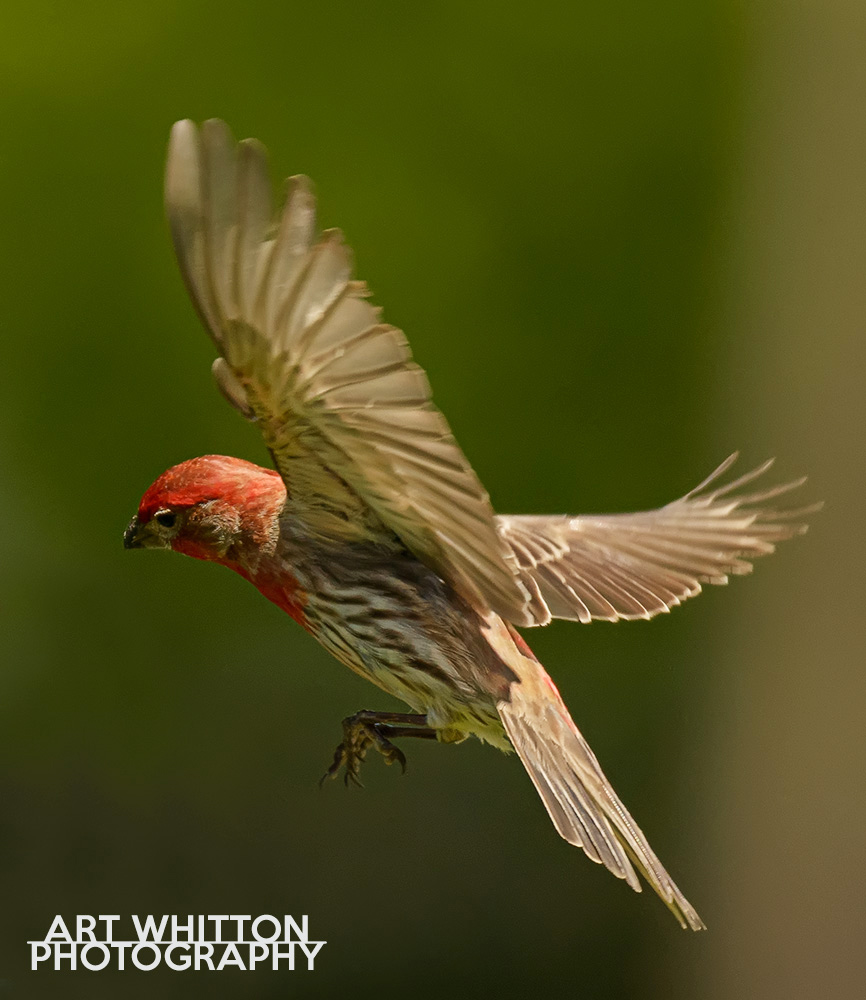
Backyard Bird Photography - Finch in Flight
- 1
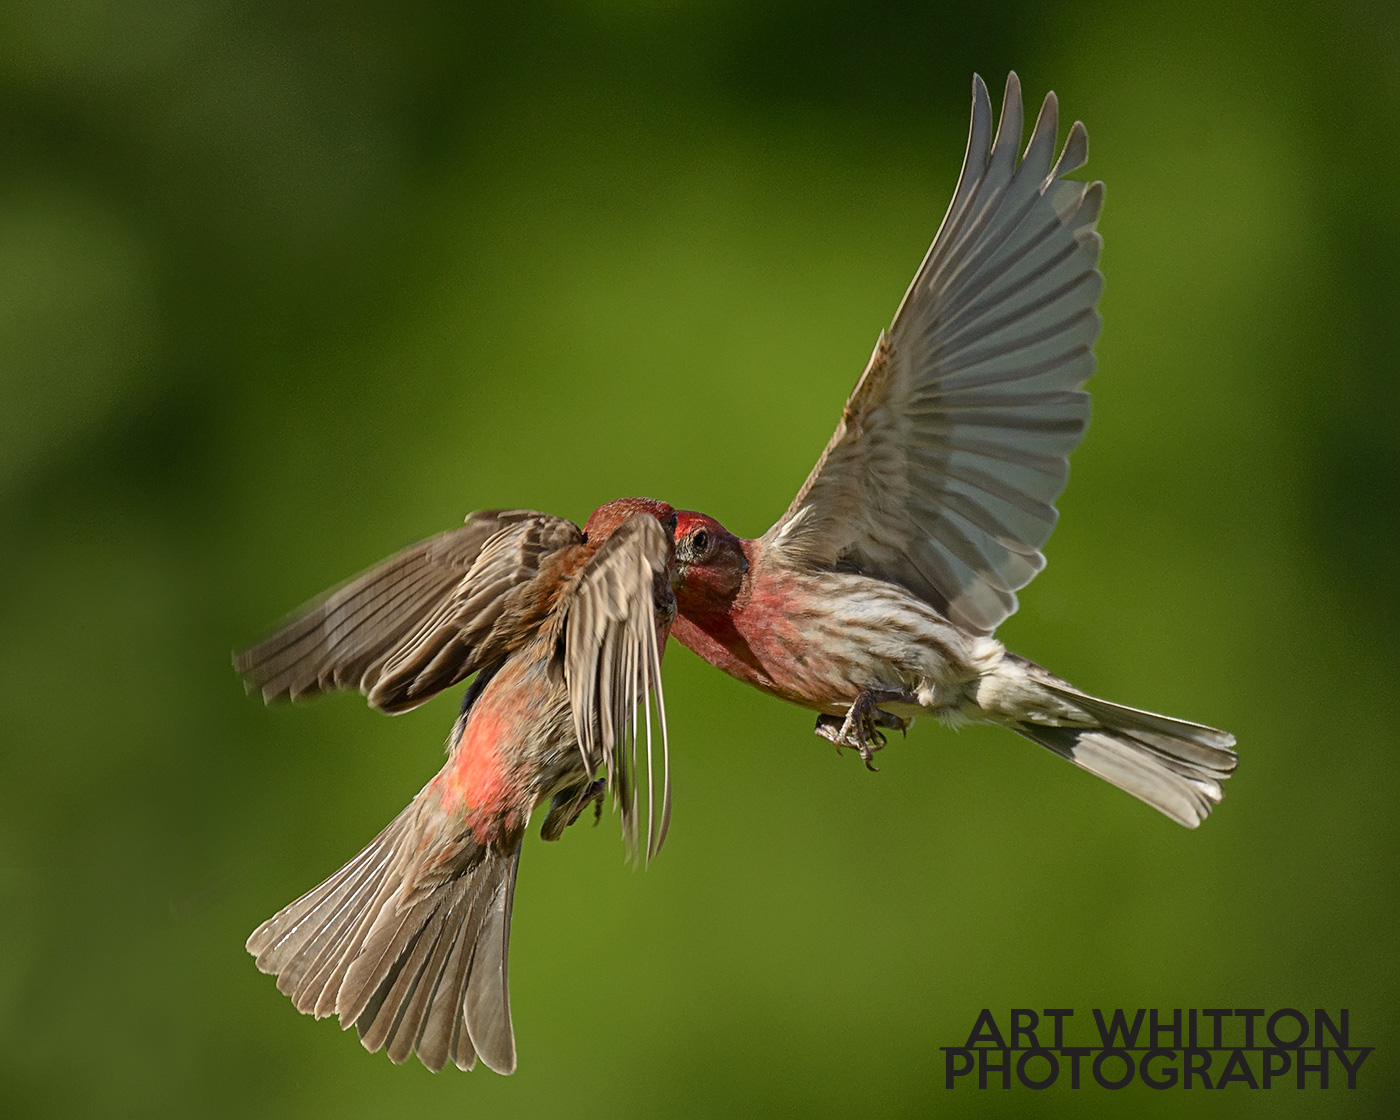
Backyard Bird Photography - Young finch grabbing dad
- 0
Backyard Bird Photography - Sparrow in Flight
- 0
- 1
Backyard Bird Photography - Woodpecker in Flight
- 0
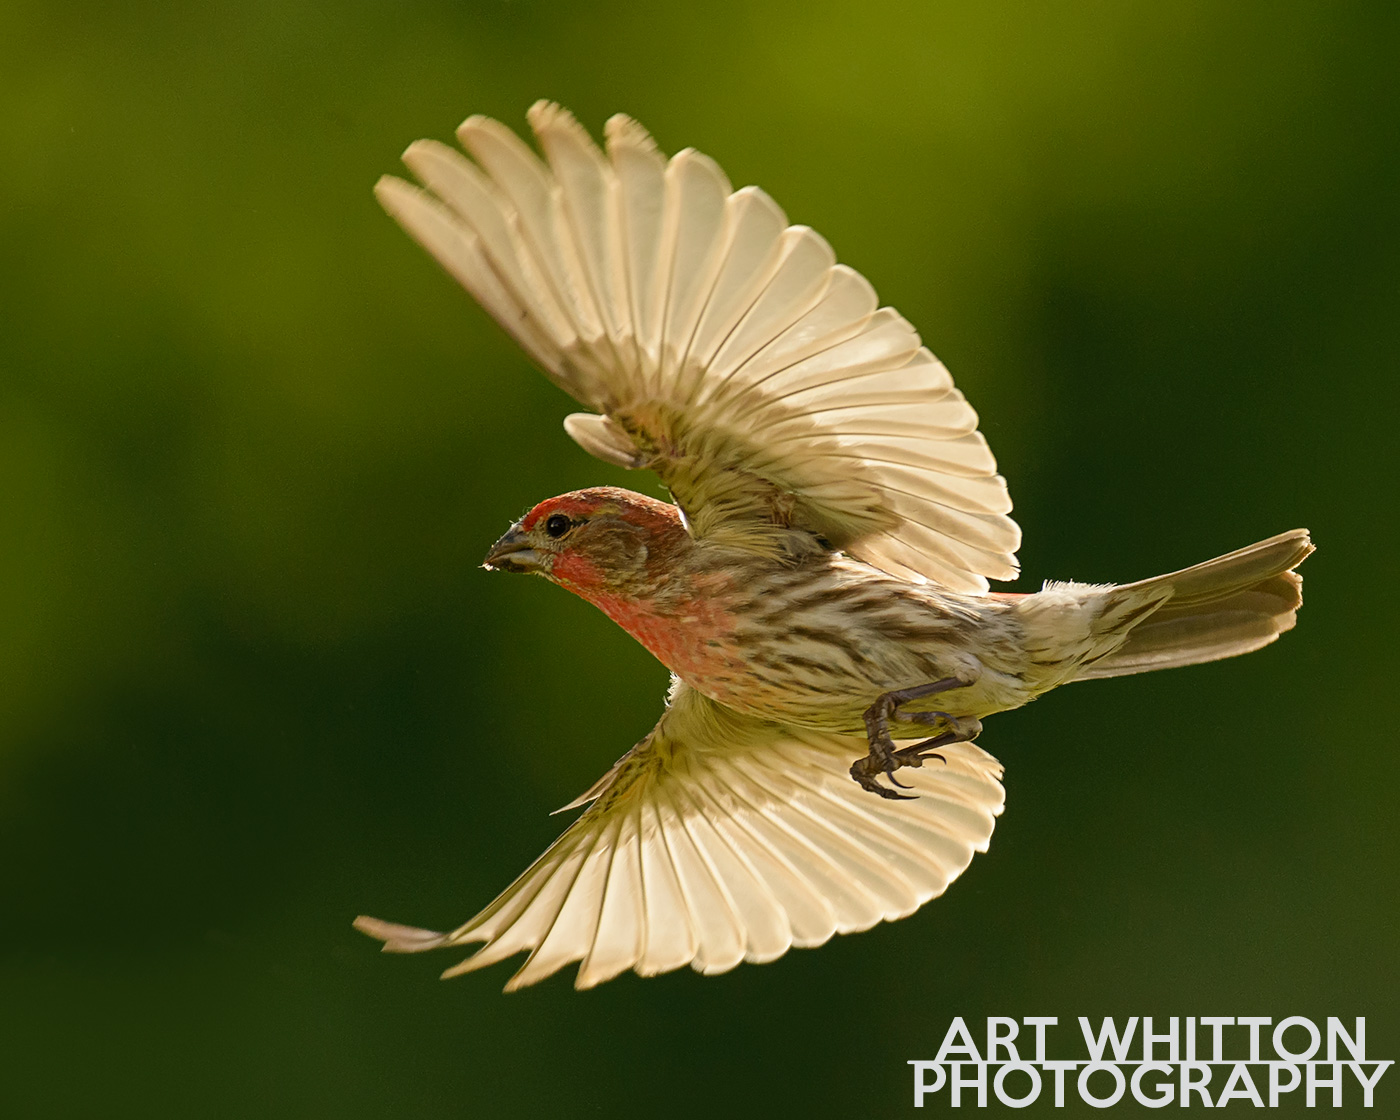
Backyard Bird Photography - Finch in Flight
- 1
Backyard Bird Photography - Finch in Flight
- 0
Backyard Bird Photography - Sparrow in Flight
- 0
Backyard Bird Photography - Finch in Flight
- 0
Backyard Bird Photography - Finch in Flight
- 0
Backyard Bird Photography - Finch in Flight
- 1
Backyard Bird Photography - Finch in Flight
- 0
Backyard Bird Photography - Finches in Flight
- 0
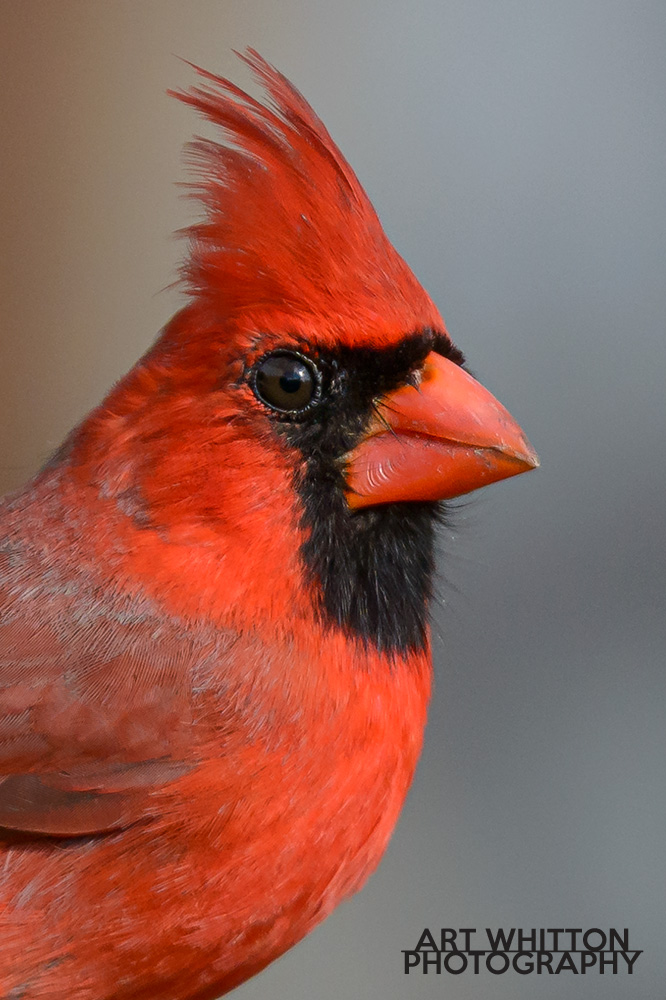
Backyard Bird Photography - Cardinal Portrait
- 0
Backyard Bird Photography - Common Grackle in Flight
- 0
Backyard Bird Photography - Cardinal
- 0
Backyard Bird Photography - 4 images merged
- 0
Backyard Bird Photography - Finch in Flight
- 0
Backyard Bird Photography - Hummingbird in Flight
- 0
Backyard Bird Photography - Hummingbird Portrait


