Photography Projects – Photo Improv for New Ideas
Introduction
It’s easy for any photographer to slip into a rut and feel a little stale. I know from personal experience, the best way to get out of a rut is grab your camera and just start shooting. But I also know it’s not easy to just start shooting when you’re feeling stagnant or maybe just a little down on where you are as a photographer. Don’t worry, we’ve all been there – it’s part of the creative process.
Photography projects are about kick-starting the creative process by shooting something that you would otherwise choose to. By shooting something out of our regular subjects, we start to look at the everyday objects with a new appreciation and anytime we see something with a fresh eye, we become better photographers.
If you’ve ever seen a comedy show when comedians on stage ask for a location, a person and a situation to start an improvisation sketch, then you’ll know where this lesson is going. I’m going to show you how I started my own personal “photo improv” session and worked through an idea that wasn’t mine.
Getting Ideas
I wanted to generate some new ideas and concepts, so I reached out to my friends on Facebook and asked for 10 items that might be found around the house. Then I asked for 10 adjectives. From there, I just randomly assembled these words into phrases and came up with the following list of new subjects:
| ADJECTIVE | ITEM |
| CHEWY | MAGIC MARKER |
| RUSTY | CORKSCREW |
| SHEEPISH | DRINKING GLASS |
| FLUFFY | BROOM |
| SHORT | FEATHER DUSTER |
| STAGNANT | PLUNGER |
| CRISPY | FORK |
| REDOLENT | HAIR DRYER |
| DUSTY | SPONGE |
| MOIST | BOOKSHELF |
Ok – that’s quite a list! But there are some fun ideas to explore. From here I can also mix and match for more ideas.
I could get more random and ask someone to pick a number between 1 and 10, but then I might end up shooting the “Stagnant Plunger”. Not today, thanks.
From this list, I’ve selected “Crispy Fork” for my improv project.
This is just one way to generate ideas for your Photo Improv project, you can ask dinner guests or send out some emails. I didn’t tell my friends what I needed these words for as I wanted the lists to be more random.
Making the Shot
Selecting the item, in my case – a fork – was the easy part. Coming up with a way to make the item or photo “Crisp” is a little harder. After thinking about it for a while, I decided to add some food to the fork (which seems natural) and for a ‘crisp’ food, I selected celery.
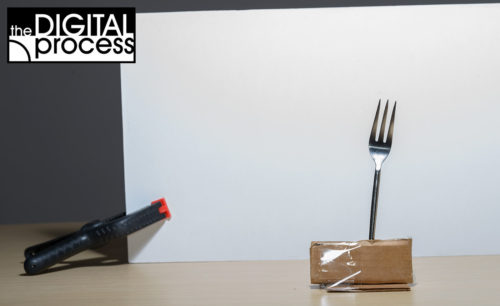
First I made a cardboard stand to hold up the fork and placed a white matte board behind it. I felt the white background would make the shot look cleaner and ‘crisper’.
I took some shots of just the fork so I could work on the look I wanted. I didn’t want it too bright, or it might blend in with the bright background, so I placed two remote flashes on either side and adjusted their power until I found the lighting I was happy with.
It might look a little dark, but for now I’ll work with this and add some celery.
Now with the celery the image starts to come together. The green adds a nice splash of colour and I’m almost done.
I think that crisp celery is usually fresh and washed, so I decided to add some water to the scene.
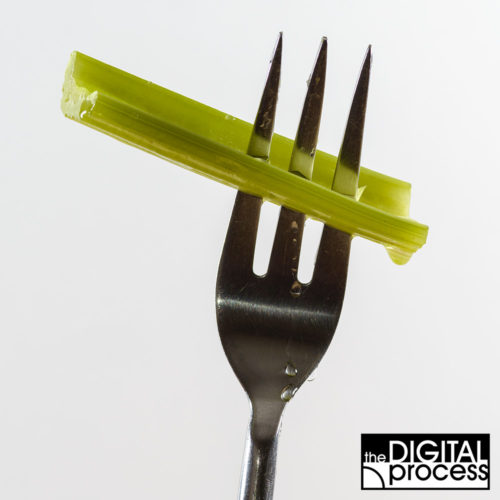
Now the scene is looking crisper and I’m closer the final image. I played around with different water amounts and tried using glycerin to thicken the water for more ‘solid’ drops.
I also added a reflecting card above the fork to lighten it up a little. I rotated the image a little to get a more dynamic angle.
With this shot I’m very close to my original vision of a ‘crisp fork’. I think it’s a simple but strong composition with a clean look. I’ll work on some other variations, but for now you can see how a new idea, a little time and you’re soon shooting something fun and different.
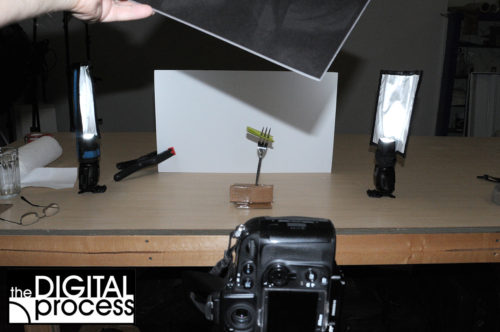
This is what I love about photography projects, you shoot something that you never would have planned the day before. Here’s a look at my set up – camera, 2 flashes, background, reflector and subject.
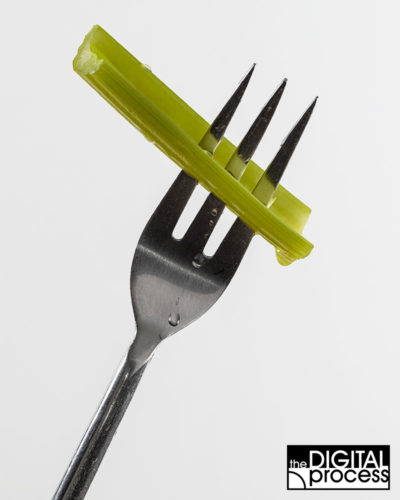
And finally, here’s the image I ended up with. I added some more water, cloned out the bigger scratches on the fork and brightened the background.
Conclusion
Using random photography projects to expand your knowledge and experience is always a good idea. If you find yourself in a rut, then shooting a random subject is a great way to get your creative thoughts going again.
Treat these projects like assignments that you have to produce for a magazine and put a little pressure on yourself to push your limits. Have fun, try new things and see what you learn.
If you end up trying a photo improve project, let me know! I’d love to see what you shot. Send me an email at info@theDigitalProcess.com or leave a comment below. Thanks for reading – Art.


