Introduction to Shutter Speed

The previous tutorial explained what happens when you control the aperture. This tutorial explains what happens when you control the shutter speed in photography. Of course there are times when you can control both, but we’ll save that for later.
Explaining the shutter is easy. When you press ‘the button’ on your camera to take a photo, the shutter opens and lets the light in, then it closes. The amount of time that this takes is the “shutter speed”.
Just as controlling the F-stop is part of the creative process, so is controlling the shutter. Setting the shutter speed (or duration) in today’s cameras allows you a full range of effects from freezing a hummingbird in flight to blurring a flag in the wind and everything in between. Although the concept of shutter duration is simple, trying to visualize the effect it will have in your images takes some practice. Can you image what a running dog looks like at 1/8000 of a second or at 1/10 of a second? This is all part of the “photographer’s eye” that you can start to develop as you work through these lessons. Start trying to visualize what the shot will look like before you shoot it. Think about how your aperture will affect the depth of field and how the shutter speed will control the motion.
Slow Shutter Speeds
I’m going to define a slow shutter speed as anything slower than “1/lens length”. Don’t worry, I’ll explain. In the ‘olden’ days before Image Stabilization (IS) and Vibration Reduction (VR), a general rule was not to hand hold a camera at a shutter speed slower than the reciprocal of your lens length. This means that if I have a 200mm lens, I should use a tripod at any speed slower that 1/200th of a second. If I use a 28mm lens, I can hand hold down to 1/30th of a second.
This is still a good rule to follow. If you shoot at a slow shutter speed without a tripod, then look at your screen on the back of the camera to see if you got the shot (aka: Chimping) – you may not see the blur unless you magnify the view. If you don’t have a tripod, brace yourself by leaning against something solid.
Despite all of the precautions needed for a slow shutter speed exposure – they can be worth it.
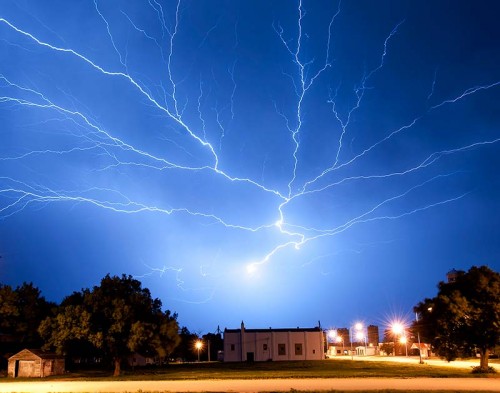
The photo above was taken with a 15 second exposure (on a tripod) and would have been impossible with a hand held fast shutter speed.
Shutter Speed and Motion
How your camera records motion depends on your shutter speed. You’ve heard that a few times by now, right? But “how” does it control motion? Look a the lightning shot above. In this example of a 15 second exposure, the camera recorded the motion of the lightning as it moved through the sky. It also recorded the motion of the trees and leaves swaying in the wind. It recorded the motion of the grass being blown by the wind. There are objects in the frame that didn’t move, like the road and the buildings.
What this tells you is that one shutter speed records the objects’ movements, but it is dependent upon the speed of the object and the distance from the camera to the subject.
As a photographer this means that if you want to control motion you might be guessing a lot when you first start trying this technique. You might find you have a great knack at setting the camera to capture a dog running, but then have to start all over to capture a race car. Even today, I will have a good starting point when I’m trying to control the movement in my photos, but will still experiment to get the best shot I can.
Have a look at the race car photo below. This is an example of ‘panning’ (explained below). It took a few shots to get the shutter speed set to one I thought would work, but that was just a starting point. The speed of cars changed. The distance from me to the car changed as they went high or low on the track. The lighting changed as the day went on and the sun set and the track lights came on. The message here is that there is no ‘one size fits all’ setting to get a certain type of shot.

Camera shake
Modern cameras with built-in control for camera shake (vibration reduction and image stabilization) will usually allow up to 2 or more stops of exposure more than you could normally hand hold. Will this always work? No – but it helps. If you have a tripod available, use it. If you have a heavy lens, use a tripod.

Even with camera shake, there is some hope. The further you are from the subject, the less it will show. In the above example, I was close to the newspaper. Also your subject defines what is acceptable, in this case you can still read the larger text, but the small text is much harder.
You can fix a lot of things in Photoshop, but visible camera shake blur is not one of them.
Fast Shutter Speed15s
A fast shutter speed16 is loosely defined (by me) as a speed that will capture a fast moving subject. A fast shutter won’t require a tripod, but you can still use one for extra sharpness. Consider some examples of when you will need a fast shutter speed. I’ve used them in car racing events.

This was shot at 1/2000th of a second.
In this example, you can see the the car is moving fast and I wanted to capture the splash as the cars raced down the dirt road. If I had shot this with a slow shutter speed17, everything would be a blur. This is a great example of when to set your camera to Shutter Speed18 Priority (Time Value on Canons). In this case I don’t care what my depth of field looks like; I know that I am far enough away to get a decent amount.
One problem can crop up with freezing the action with a fast shutter speed19. You can make the subject look so static, that there is no speed implied in the photo. Here are two photos of a car speeding around a course – which one looks like it’s moving?


These two photos were both shot at 1/1250th of a second and f7.1
In this case, it is the composition that makes the bottom image convey motion due to the car leaning in the corner of the track.
Shutter Speed20s and Distance to the subject
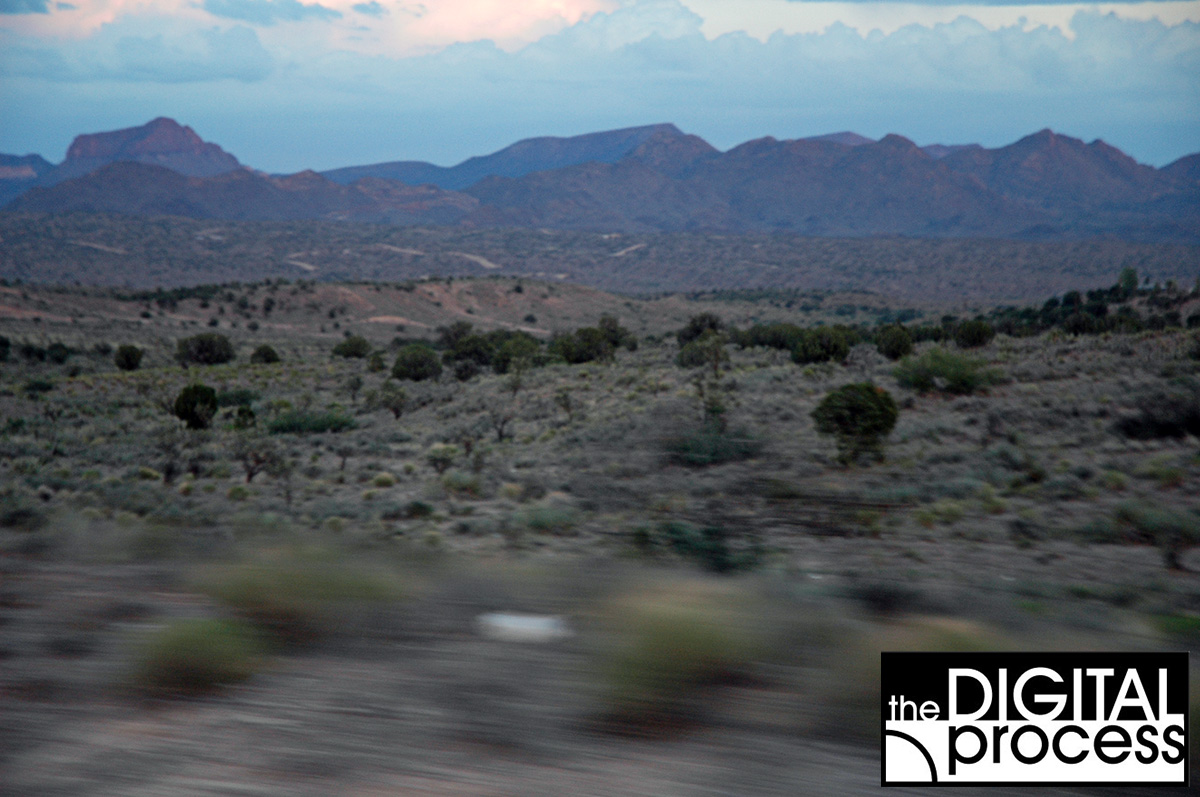
Speed appears relative. This is important to remember when shooting moving subjects. The closer you are to the subject, the faster it will appear. When you are driving down the highway, the signposts move by fast (extremely fast when you are close to them). The telephone poles move fast, but not as fast as the sign posts. Further back are the trees in the fields – the don’t move as fast as the telephone poles. And the hills in the background don’t seem to move at all.
Even though you view these objects at the same speed, they will fly by at different speeds. Try taking a photo of a 75 mph sign on the freeway (please be a passenger for this one). It gets harder the closer you get. You’ll also need a very fast shutter speed, or it will just be a blur. Next take a photo of the horizon. Now you can take your time use a slower shutter speed21 if you like.
Ok, now reverse positions. Imagine that you are on the side of a racetrack and taking photos of the cars. They fly past and you have to be quick to catch them – you need a fast shutter speed22, or they’ll just be a blur of color. Now move back to the grandstands. Ahhh – much easier! (but not as much fun).
Panning and Shutter Speed
Panning is a technique where you move the camera in the same direction as the moving subject at the same speed. Done properly, it will allow you to capture the subject sharply while blurring the background due to camera movement.
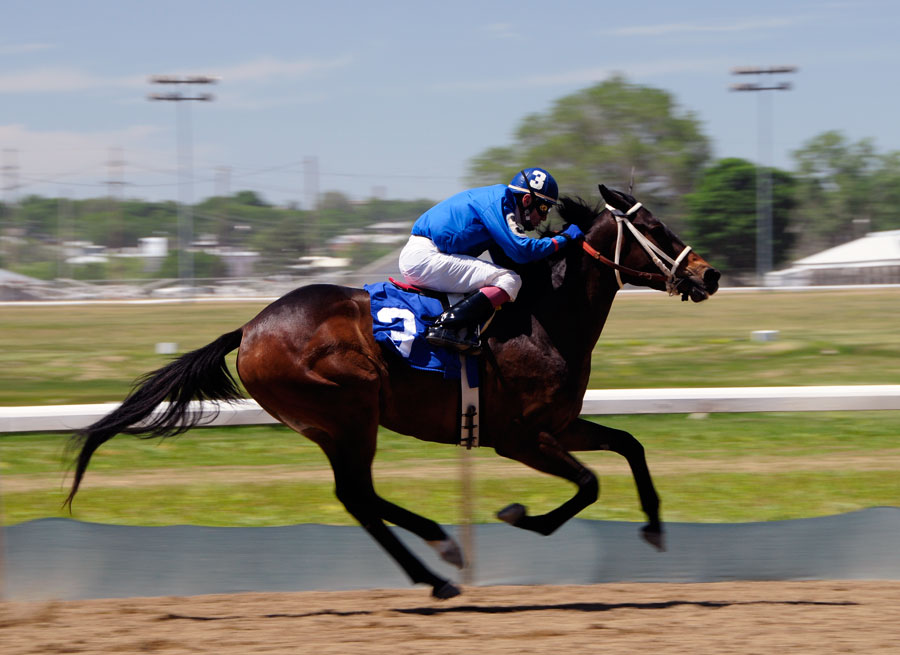
In the example above, I was able to stand next to the racetrack and wait for the horse to pass by. As it did, I followed the horse with my camera and took the shot as he was in front of me. Since the camera was moving at about the same speed as the horse, the horse remains fairly sharp in the photo. Because the background is not moving, it is blurred. This is a great way to use your control of shutter speed23 to convey motion in your image.
If I had shot this with the same setting of 1/200s and not moved the camera with a panning technique, the horse would be blurred and the background would be sharper.
How Tripods and Shutter Speed24 are Connected
As you read above, I’ve said to use a tripod if you are worried about camera shake due to a low shutter speed25. But anytime you want the sharpest photo possible, you should use a tripod. Even at speeds of 1/500s you can still get camera shake. Also, when you have your camera on a tripod, you should turn off the image stabilization feature as it can ‘try’ to remove vibration, but actually add some.
Flash and Shutter Speed26
When shooting with a flash unit, you will likely be limited in your choice of shutter speed27. All cameras have a maximum ‘sync’ speed for normal flash photography. This is usually in the range of 1/250s to 1/320s. On the other end of the scale, if you have a slow shutter speed, you can get a ‘double exposure’ of a blurry long exposure combined with a sharp flash exposure. While this can be used to great effect, it can also ruin some otherwise great photos. Learn what your camera’s sync speed is and remember to set it if you are in a ‘non-automatic’ mode while using your flash. Some newer cameras let you change a flash setting to use much faster shutter speeds, but then you must shoot much closer to compensate for this feature.
Using Shutter Speed28 Priority Mode on your Camera
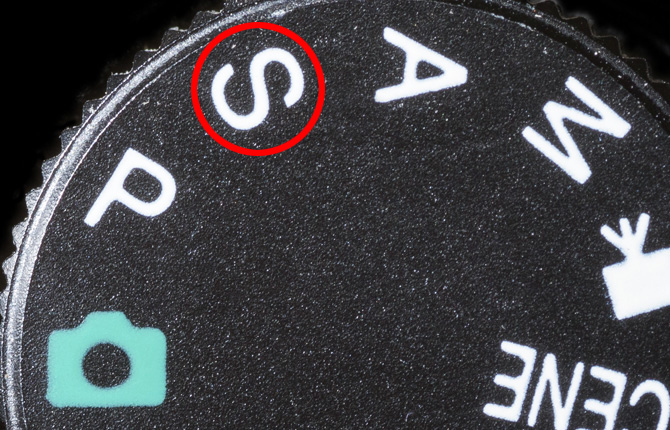
Just as the previous chapter explained the basics of shooting in Aperture Priority mode, I’ll explain how Shutter Priority mode works.
In this mode of shooting, you will set the shutter and the camera will select the best aperture based on the amount of light. If you select too fast of a shutter speed29, you may see your aperture setting flash in the viewfinder.
If you can, set your ISO to be automatic while you are learning (one less thing to worry about). Try to find what the lowest shutter speed30 you can use while hand holding the camera. This is a personal issue that each photographer should learn.
These factors limit which shutter speed31s you can use:
- The amount of light (lower light equals slower shutter speed32s)
- The aperture of the lens (lower f/stop equals faster shutter speed33)
- The distance to your subject (a closer subject needs a faster shutter speed34 to stop motion)
- The focal length of your lens (a wide angle lens can be hand held at a slower shutter speed35 than a telephoto – (1/focal length rule)
Conclusion
The main concept to remember regarding shutter speed36 is that this is the setting that controls motion. This motion is either the motion of the camera (camera shake or panning) or the motion of the subject (freeze action or blur the subject).
There are no hard rules about what is the ‘best’ shutter speed to use for any particular photo. Remember the ” 1/focal length ” rule for steady hand held shots. Remember the closer you are to the subject, the faster the relative speed.
The best way to combat camera shake is to use a good tripod. A flimsy tripod doesn’t always help.
The best way to see how shutter speed37 works is to find something that moves quickly (kids and dogs work well) and set your camera to Shutter Speed38 Priority (Time Value) and experiment. Review your images and look at the keepers AND the rejects. Try to explain to yourself why some shutter speed39s worked and some didn’t.
If you have any questions about his topic leave a comment below or feel free to email me at Art@ArtWhitton.com – happy shooting!