Basics of Landscape Photography

Landscape photography has been a popular subject since cameras were first invented. The early cameras required a long shutter speed to expose the glass plates that were in use back then. People often moved during the exposure, but mountains stayed still.
Early photographers were some of the first explorers of the American West and recorded vast scenic wonders that had not been viewed by anyone before. Photography helped to fuel expansion out west and create national parks. But what of today’s landscape photography?
These days, there isn’t much for the average photographer to discover, but there is always a new way to look at familiar places. Also remember what is a common view to you may be a new experience for other people. To me this is what I think about when shooting a landscape. What can I tell about this location to someone who has never seen it? What makes this location unique and worth taking your lens cap off for? What elements do I see and want to highlight?
All of these questions and more can (and should) enter your mind when you are shooting a landscape or outdoor scene.
For further reading, check out my guide to Basics of Composition in Photography.
What is a landscape?

A landscape photograph can be any outdoor scene that you shoot. It can have people in it, or any combination of water, sky and land. Is a cityscape a landscape? Why not? It has different elements, but the questions that I asked above would still apply to a cityscape photo. Really, a landscape is just about any outdoor image that does not ‘feature’ a person (that would be a portrait) and gives the viewer some information about the environment.
Think about how far you have to travel to take a landscape photograph. For me it’s about 1 mile or less. I live in Nebraska and love to shoot landscapes out here. Nebraska isn’t a hot spot for photographers like Oregon with its amazing coastline or Colorado and its majestic mountain views. In fact most people that drive through Nebraska would call it ‘boring’. That’s my challenge. I like to show people that the area around me can be beautiful and interesting.
Plan your image
Now that you’re ready to shoot a landscape and you’re out in the field: what are you going to shoot? Look around you in all directions. What feature strikes you the most? Is it the sky and clouds? An interesting rock formation? The pattern in the fields? The mountains in the distance? It could be anything and everything. What do you ‘feel’ when you are there?
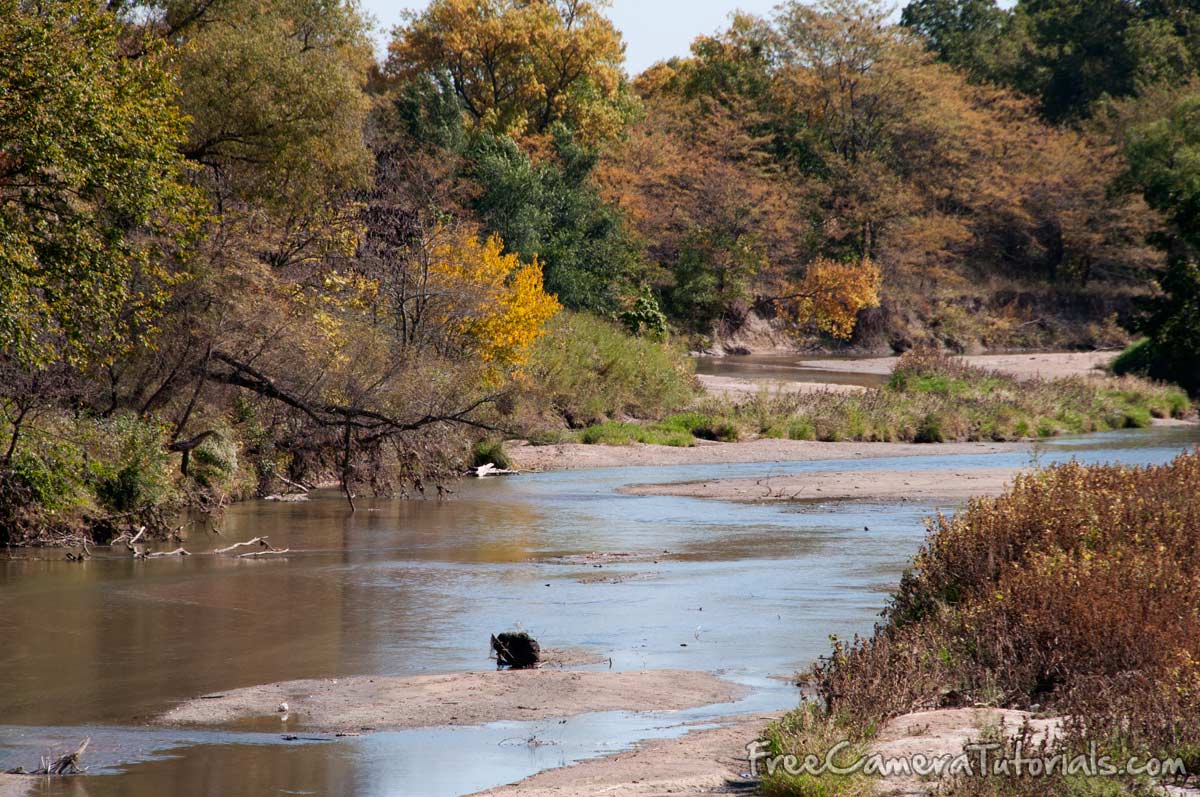
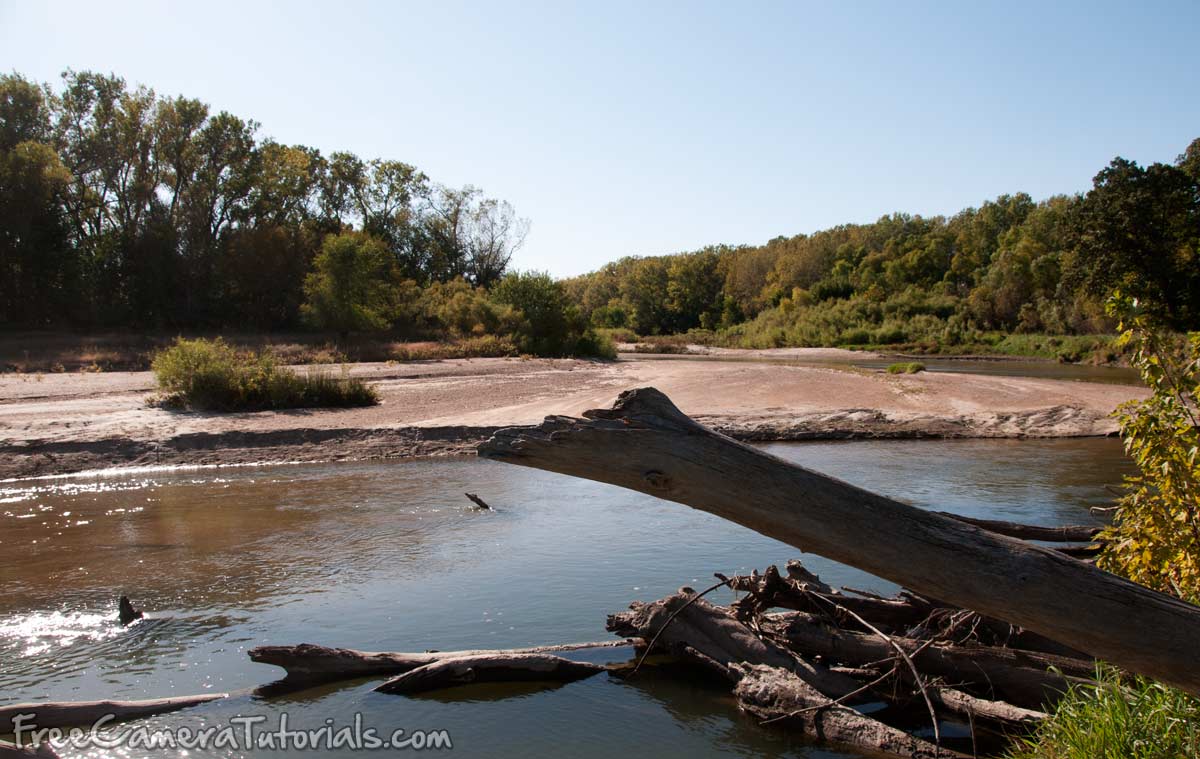
Let’s take a look at this scene on the left (Click any image to enlarge it). This is the Little Blue River near where I live. It’s not the most interesting river in the world, but it’s all that I have to work with. When I look at it, I notice that it is peaceful and uncluttered by anything man-made. I like how the foliage is close to the water. There are some interesting branches that reach out over the water. It’s fall and the trees have some variety in their leaves.
What strikes me is that the water is quite low. It’s early October and the river is low after a dry summer. Now that I’ve thought about it, I have a lot to work with.
Composing your scene.
Like any kind of photography, there are some rules that we can look at in landscape photography. One of the most common and a great one to learn with is to think of the ‘depth’ of your image. Look for a foreground, something a little further back and a background. Try using three layers to help you compose your image.
What the foreground object(s) does is help bring your viewer into the image. This is not always easy to find, but it is worth looking for. What is your foreground?
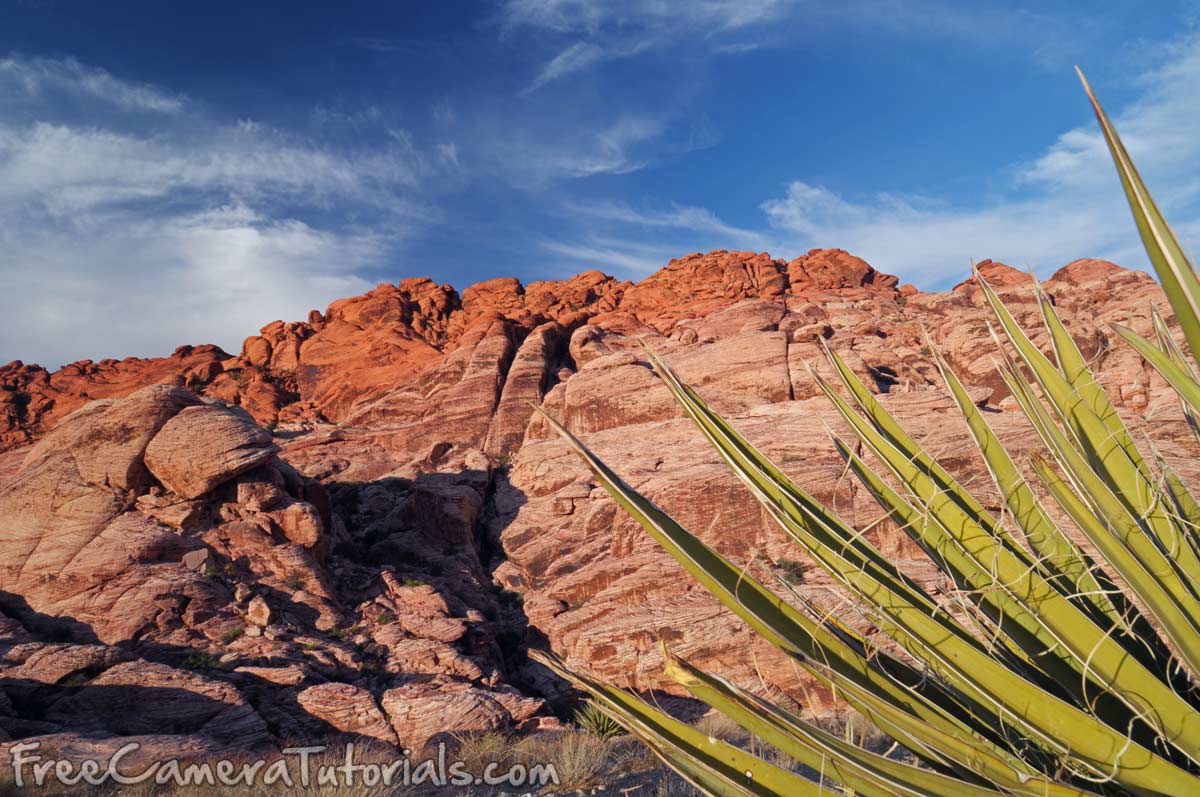
This image shows how a foreground object helps tell more about the environment. I could have shot just the rocks, but adding the Yucca plant gives a better sense that you are looking at the desert. It also adds a nice color contrast to the red and the blue. Also look at the lines of the plant that radiate out from the bottom right corner and guide your eye to to the top center of the frame.
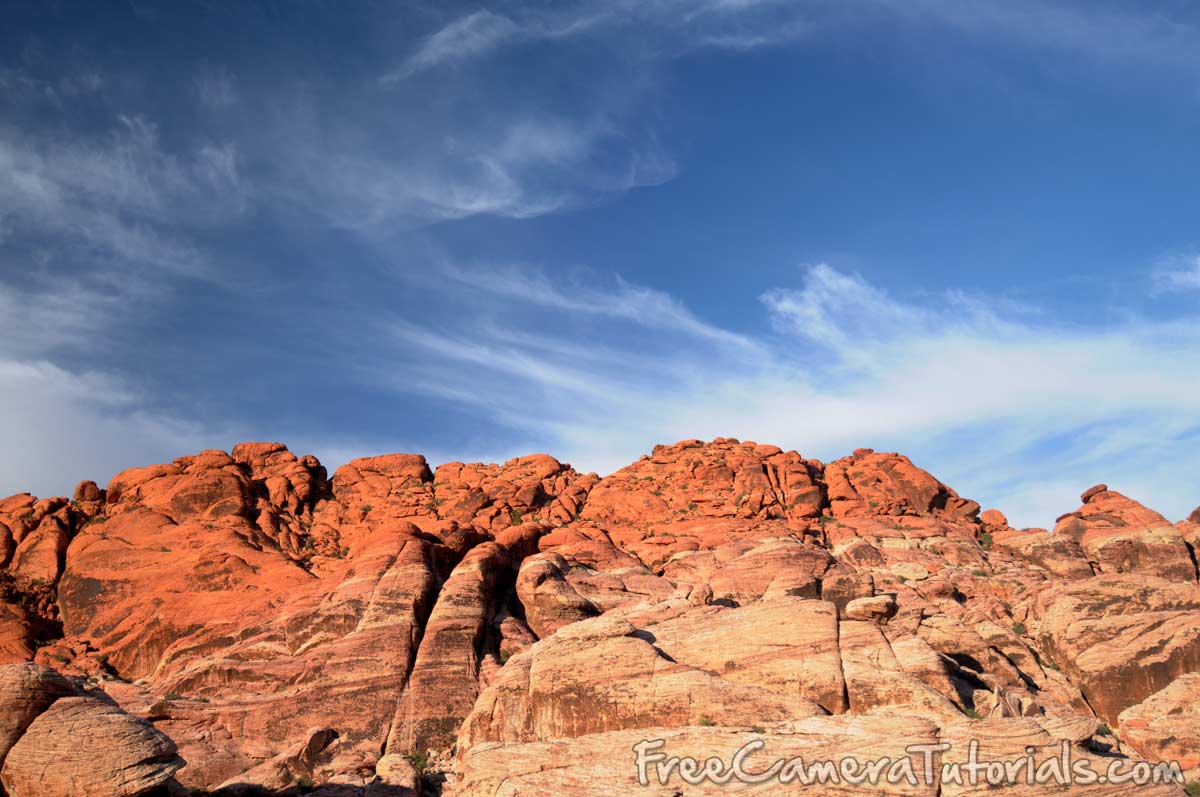
Have a look at the same scene without a foreground object. Which one do you prefer – and why? Without the Yucca plant, it’s just a photo of some red rocks. Not every image needs a foreground object, but it usually helps. Try shooting the same location with and without a foreground. See what works and what doesn’t. Try the foreground in different parts of the scene.
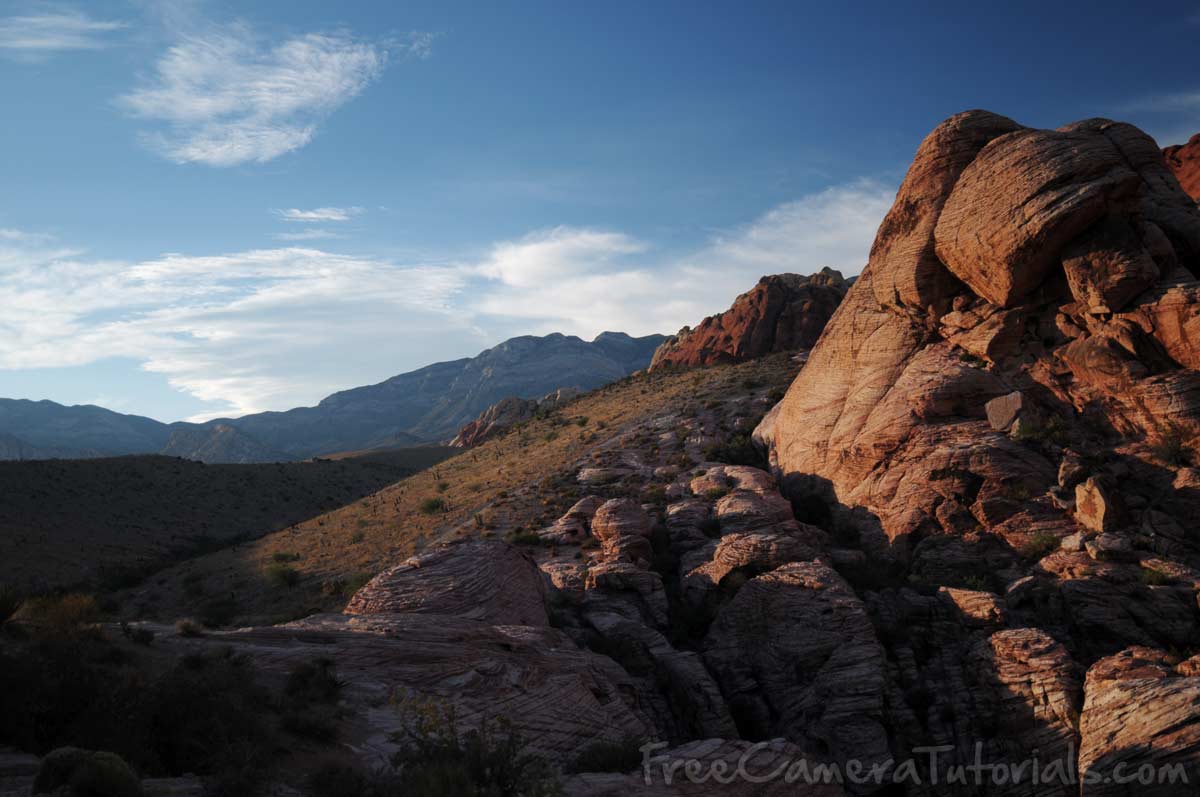
A foreground object doesn’t always have to be something close. This image has some distinct layers, but the closest objects are the rocks on the right side. Each layer is lit a little differently as you look back into the photo. It shows that you could keep walking along the desert floor and follow the hills to the horizon.
You also want to pick your foreground image carefully. In this image, the branch juts into the frame but doesn’t add any interest to the photo and actually detracts from it. It breaks up the shoreline and is a distraction. Always check to see if your foreground actually helps the image.
Have a look at the image below. I’ve shot the scene from a bridge and ‘stretched’ the foreground out by showing the shallow water and use it to lead the view up the river. In the background, the trees converge to the middle of the frame. I use these elements to draw the viewer into the image and lead them ‘downstream’.

When it comes to composing your image, think of the scene in layers. Add interesting elements when you can. Take time to compose the image in the viewfinder, but don’t get tunnel vision and exclude elements that could make your photo pop. Poke your head up from behind the camera and look around you.
There are many books that will delve into these subjects much deeper, but when you’re starting out it’s good to begin with some basic rules and build on them. Think about what works in your photos and what doesn’t. Pick 4 or 5 of your favourite images of a landscape and ask your friends which ones they like and why. It’s likely that what they see is different that what you see.
The Rule of Thirds
There are a few general rules in Photography, but I like to think of them more as guidelines. You don’t have to follow these rules to get great photos, but they can help you when you’re trying to figure out a shot. I’ll use a few in these lessons and this is one of the most common.
The ‘Rule of Thirds’ is a composition tool that tells you divided the scene into thirds both horizontally and vertically. For example, if you shoot a sunset, you could put the horizon line in the dead center of your photo, or you could raise or lower it. Try experimenting with different placements of your horizon and see what works and what doesn’t.
Here’s an image that shows how this rule can be applied. Is it the best composition for the scene? Maybe not, but it’s a great place to start and get some ideas.
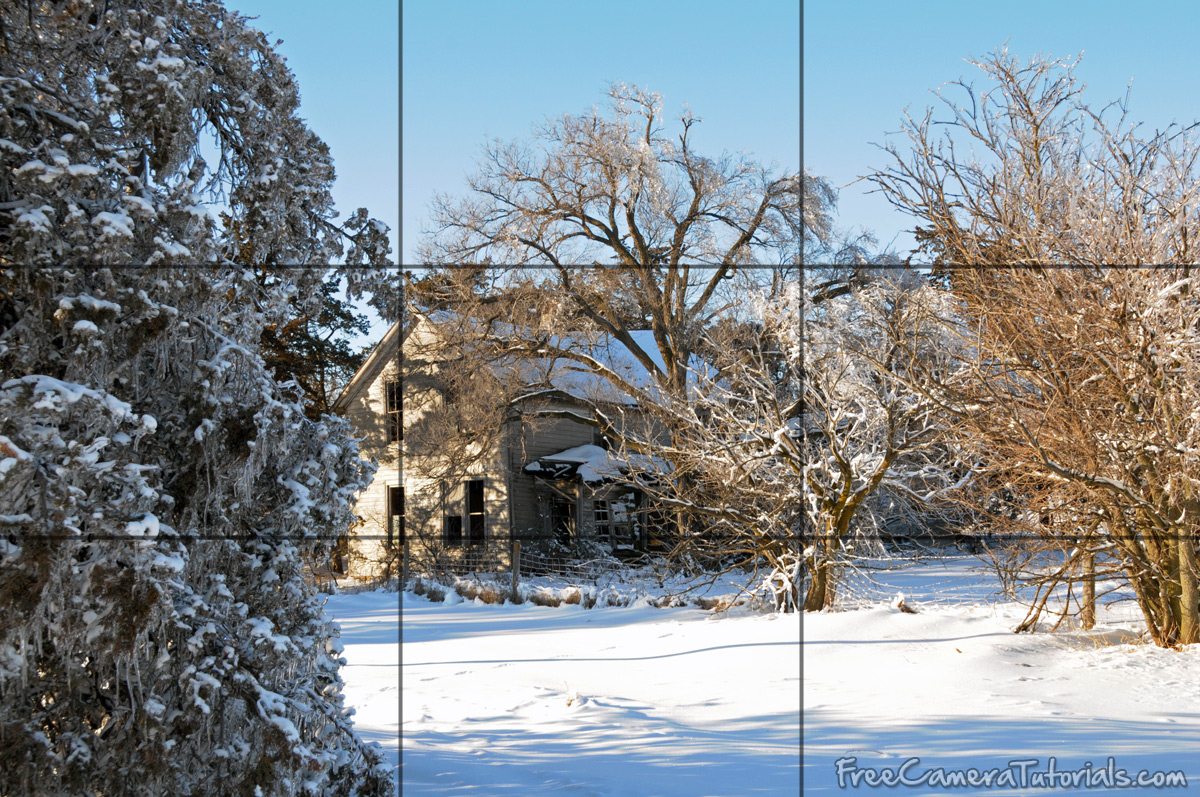
I have overlaid some lines to show where the image is divided into thirds. On the left is a snow covered tree that takes up the left thirds. The snow on the ground takes up the bottom third and the sky takes up the top third. I included the tree to give the impression that the viewer is walking through the snow, passed a tree and spotted the abandoned house.
Here’s another example. You’ll notice that the horizon isn’t at the ‘third’, but other elements are close, such as the large rock on the right and the rock with the wave hitting it on the top left.

Once again, these are just guidelines to composition, but I’ll use the rule of thirds as starting point if I don’t see a good composition right away. Learning composition is one of the toughest aspects of landscape photography and there are many great books on the subject to learn more.
As you change your composition, the lighting can change. The scene will also change depending upon the time of day and the amount of sunlight. When I lived in Las Vegas, it was almost always sunny and there was very little time before the sun went down over the mountains. This limited my options. The next section deals with light and landscapes.
Lighting in Landscape Photography
For a lot of your landscapes, lighting is taken care of. You have the sun and it lights everything. Very simple, right? It can be, except that during the day you could have a bright sunny day, a sky with some clouds, total cloud cover, dark grey skies and any variation between them. Much of the time you are stuck with what the skies provide you. You might be out at the Oregon coast for one day only and it could be raining and horrible or bright and sunny – you never know until you get there. These changes in light will also affect your White Balance. If it’s sunny out, set your white balance to ‘Sun’ instead of ‘Auto’ and you’ll get better colors most of the time.
If you listen to serious landscape photographers, they’ll tell you to never shoot at mid-day. Wait for the ‘golden hours’ at sunrise or sunset. This is great advice if you have the time to plan your visit. A lot of the time we don’t have that option. Also, you can get some fine photos under a noon sun.
If you have time, try to revisit a location throughout the day. Take some photos of the same view during early morning, noon and night. See what parts of the scene are hit by the best light at what time of day. You can’t move the sun and clouds, but your timing can greatly affect your image.
The amount of light also affects your shadows. Shooting on a sunny day will give you darker shadows than an overcast day. That means that your range of light from dark to light will be much greater as well. That leads to exposure decisions as your sensor will not capture the range of light as well as your eye.
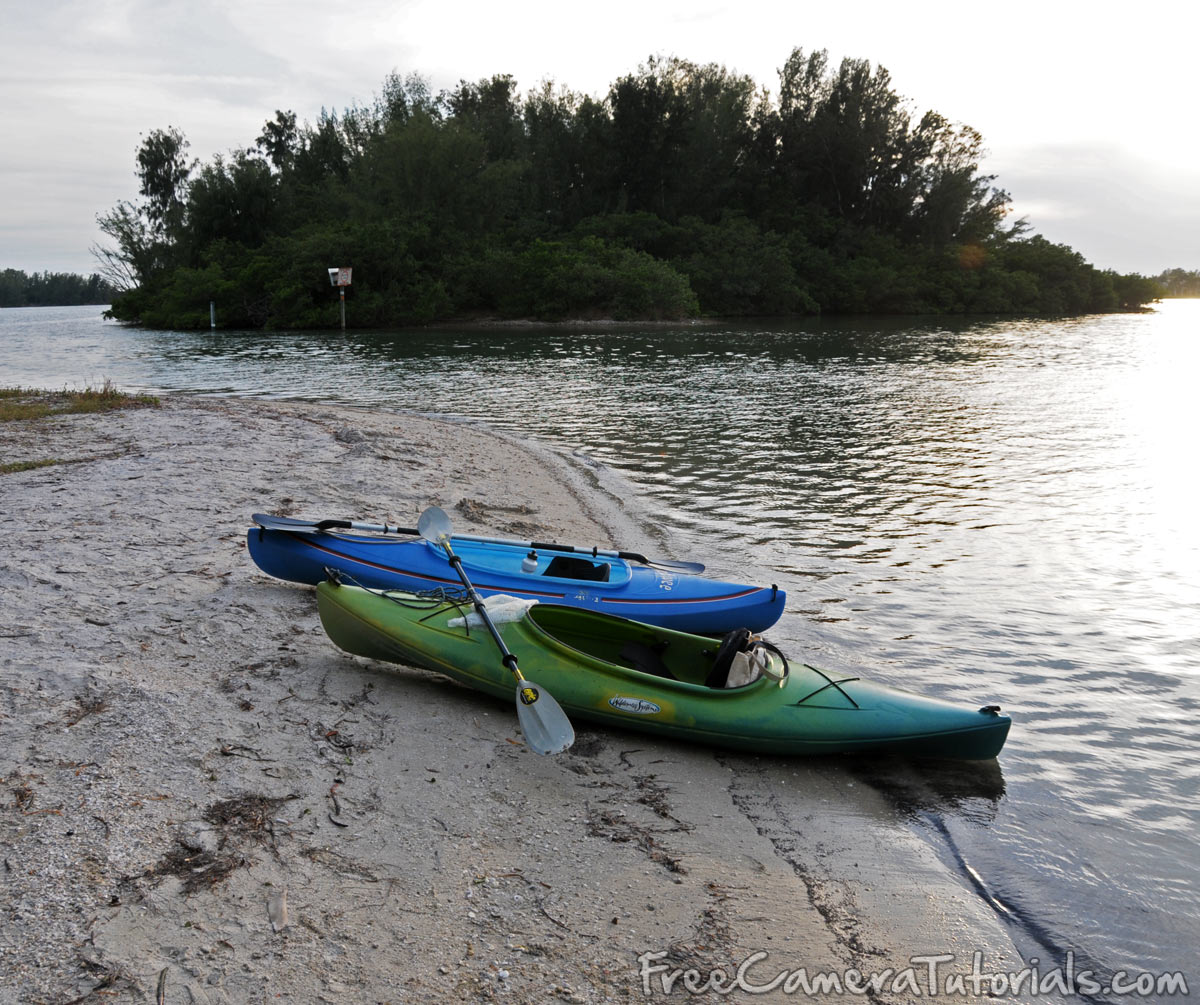
Look at the scene of the kayaks above. It was shot at about 4pm on an overcast day. Notice how drab the colours are. The shadows are soft. I was on a tour, and that was only time that I would be on that island. I ended up with a drab photo. It doesn’t hurt to have a quick look at the sky and see if a cloud is about to move away from the sun and give you better lighting.
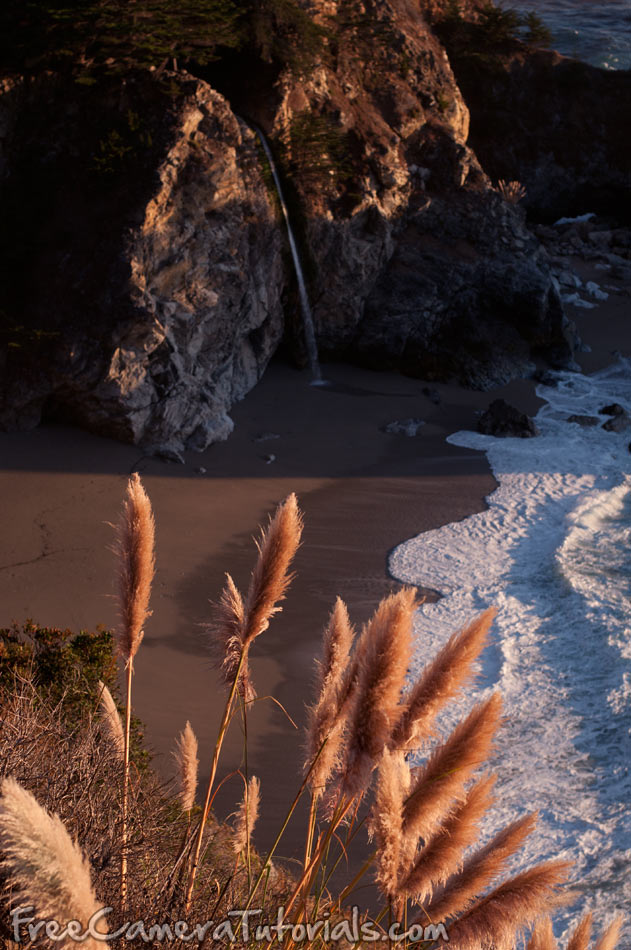
The next image (above) was taken at Big Sur. I shot it at about 5pm on a sunny day as the sun was starting to set. I have nice warm colors, good contrast between light and dark. I ended up with a fine photo thanks in large part to the lighting. Imagine if I had the dull overcast light of the kayak image. Lighting outdoors is all about your timing.
One note about the Big Sur photo. It has good composition, color, exposure and is a classic scene, but there one thing I really don’t like about it. Do you see it? There is a line right across the middle that divides the image in half. This is something you want to avoid as the viewer’s eye will stop looking around the image. I could cut this in half and have two distinct images.
I like to shoot a lot of sunsets here in Nebraska. That means that I’m shooting at the end of the day using the last bit of light that there is. Even then, there can be great changes within minutes as the sun sets and reflects up in the sky. Below are two photos taken 10 minutes apart.
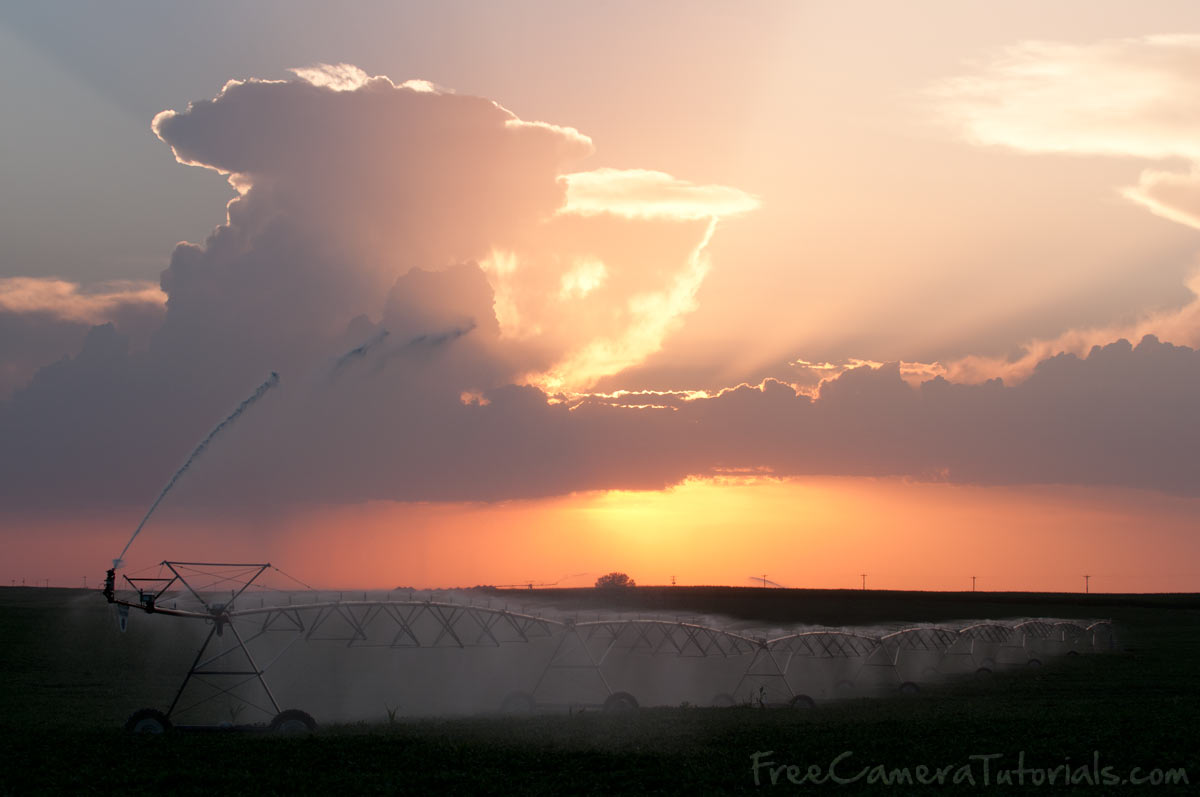 | 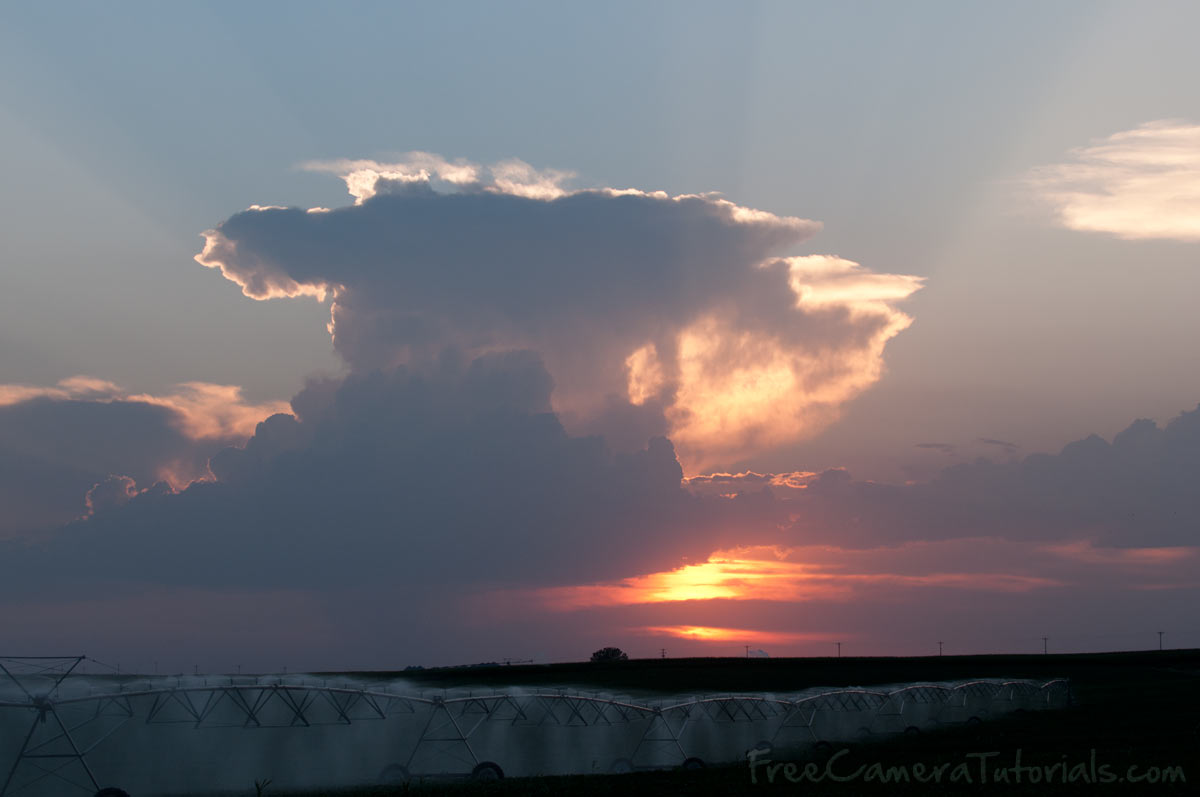 |
Timing is everything.
Many great photographers will not let their photography happen by chance and will stay in one location for weeks or months to get the perfect light that they are looking for. They might revisit the same location dozens of times throughout the year to find out the best time to shoot. If you are just starting out, use what resources you can to experiment with the same location at different times of day and different times of year to improve your photography.
The light that is available will also affect the settings you make. The aperture that you use will be one of the major contributors to your image. Aperture controls two things – your depth of field and the amount of light coming to the sensor. In many cases you want as much depth of field as you can get in a landscape, so if you set your aperture to f/16, you will end up with a slow shutter speed than if you shoot at f/4. A slow shutter speed means that you’ll want a tripod. In fact, a tripod is great to have for any landscape photo. In most cases your subject isn’t moving and you have time to compose and shoot the scene, so use a tripod for the sharpest image you can get.
So now that you have your composition and your light is good, it’s time to capture an image!
Shooting your scene.
This is the easy part. The actual “photography” part. If you have planned your composition and lighting beforehand, shooting the scene will be easier.
Remember the five factors of taking an image?
- ISO
- White Balance
- Aperture (controls depth of field)
- Shutter Speed (controls movement)
- Light (let nature take its course)
As a general rule, you want your landscapes to be sharp and crisp images, just like you see the scene. As I mentioned above, a tripod is almost essential for this.
To get a sharp image, you’ll want your ISO to be as low as your camera can go – usually 100 or 200. Set this first.
Now check your White Balance. This should be part of your pre-shooting checklist, but lighting can change throughout the day. If you’re in doubt as to what setting is best to use, leave it set to Auto. But for best results use the setting that matches your light. Daylight, Cloudy, Shade are some of the options you might have. Your camera will do a good job most of the time, but making this adjustment will get your colors a little more accurate and consistent. The difference is subtle, but every little bit helps.
 | 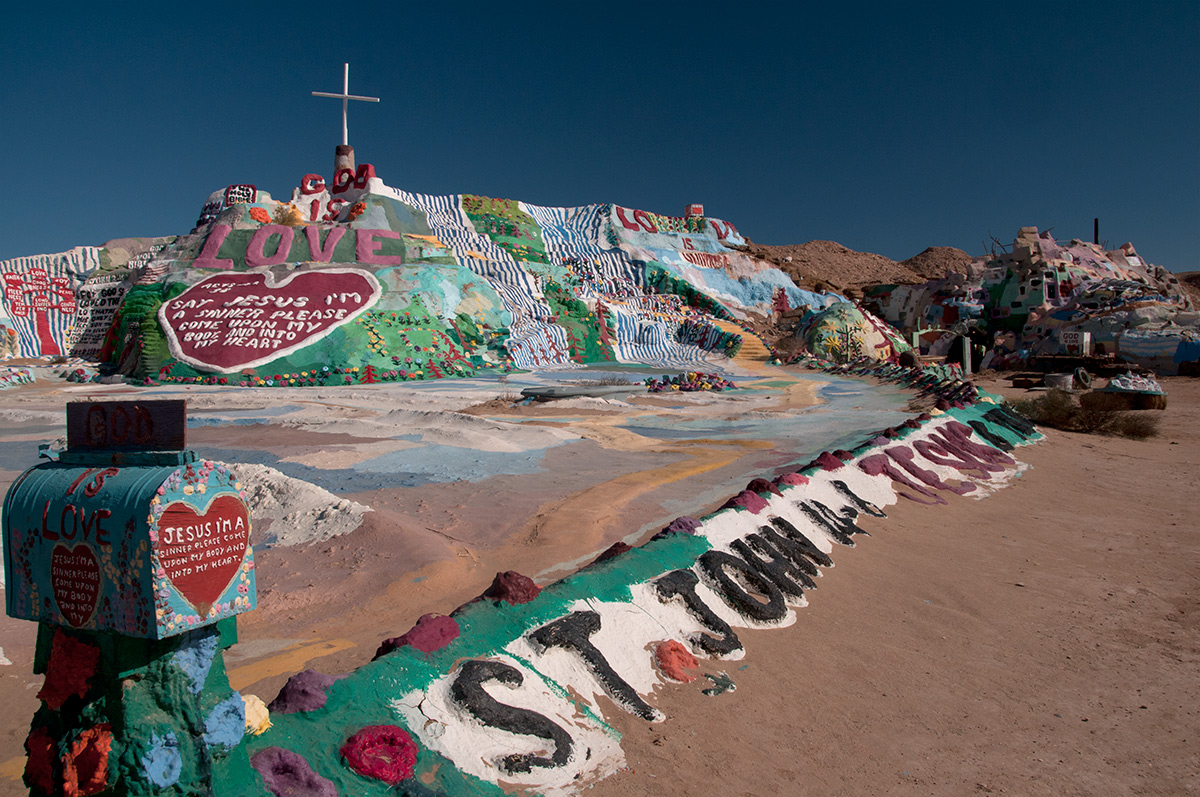 |
If you have a look at the two images above you’ll see that they are very similar. In fact they are the same image using different white balance settings. The one on the left is using Auto and the one on the right is using Daylight. It was shot in the desert, so there was plenty of daylight! Have a look at them full size and spot the difference. Look at the sand in the bottom right for example.
With your ISO and WB set, it’s time to see what aperture you want to use. In many cases, you’ll want the most depth of field that you can get. I’ll try to shoot landscapes in the f16 range. This will help me get the foreground and background looking in focus.
Also, think about where you are going to focus. Is there any part of the scene that needs to be in focus? You can focus on the background, the foreground or somewhere in between. You have a lot of options.
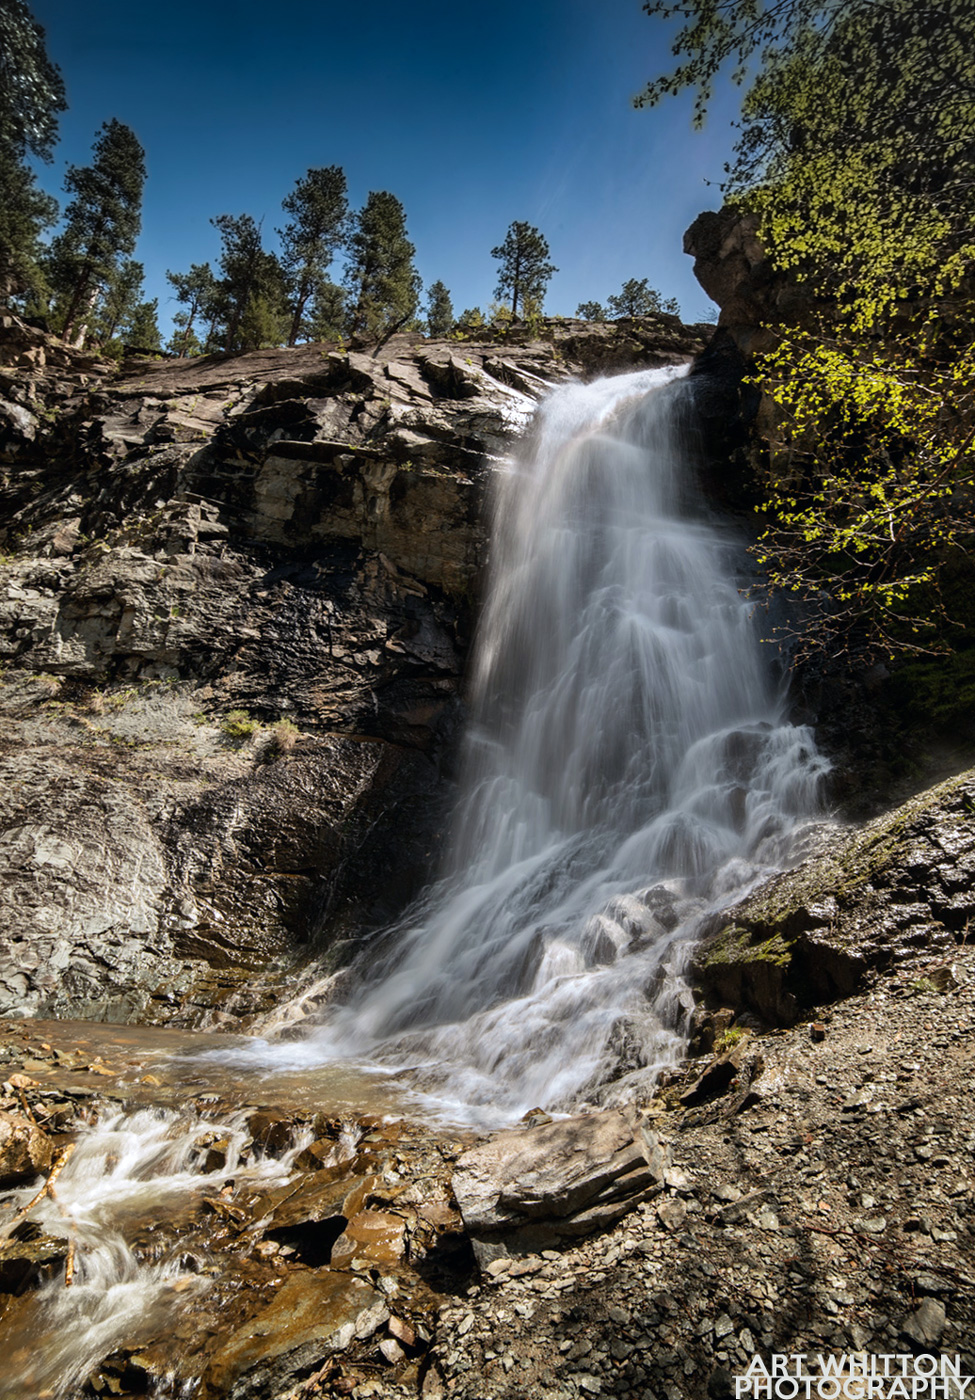
Landscapes rarely involve motion. This helps your decision as to how you will shoot it. You won’t care about shutter speed. Your scene might have some running water and slow shutter will blur the flow, so there are times when you need to consider shutter speed.
Thanks to digital technology, you can try different settings and it won’t cost you any money. You can also review the image file’s EXIF data to review what settings you used.
Start shooting and try some different exposures – move around to get new viewpoints – go crazy with it! You’ve set the scene up, so take advantage of it. BUT think about why you are changing your settings and what you see from a different viewpoint.
Summary
Once you have taken your photos and maybe adjusted them in your photo software, review them. Pick out your favourite 3 images. Then step away from it for a few hours. When you go back to those same 3 images – do you still like them? Do they remind you of why you shot the scene the way you did? Show them to a friend or relative and get some feedback.
I hope that you learned in this project how preparation and thought can help you create a better image. Take the time to review your choices in composition and exposure.
Questions
Will you return to the same scene and re-shoot it?
Did you make the connection between depth of field and aperture?
Do you understand how white balance affects your image?
What did you learn? Feel free to let me know what you did or didn’t learn. art@artwhitton.com