A Guide to Selecting Camera Bags
Introduction
I’m not saying I have a obsession for camera bags, but I do have one for almost any occasion. I’ve been shooting for a while, so I’ve ended up with a decent collection of bags and cases over the years. This lesson will show how different bags are needed for each type of shoot.
From the simple small case to a roller backpack, there’s a case out there for any occasion. Maybe you just need to grab your camera and single lens; maybe you need to bring all your gear along for a road trip across the desert. It’s rare that I’ll take my camera along without a case to protect it.
Camera bags serve two purposes: protection and organization. Each style will offer qualities that help you decide which will work best for you.
General Considerations
Before getting into specific styles, here are some things to look for with any case. First and foremost is overall quality. There’s no reason to buy a cheap bag for expensive camera gear. A cheap bag will offer less padding, use cheaper materials and you’ll soon find issues with things like zippers and stitching failing earlier than expected.
When in doubt about quality, it’s worth looking at some of the bigger name brands (LowePro, ThinkTank, Tamrac, Pelican are just a few). If this is the first case you’re thinking of buying, make sure to read reviews and visit your local camera store to get a feel for them before purchasing.
The biggest feature to look for in a bag is protection. That’s the whole reason for a case, so before looks, colour, etc – make sure it will protect your gear. Look at the padding both on the outer sides and the interior areas. Many bags use moveable, padded dividers that Velcro into place. These should be thick enough to prevent gear from rubbing against other pieces.
Only you will know how much protection you’ll need. For the average photographer, that’s a semi-soft case with padding inside and out. For a professional, that might mean a hardshell, waterproof case which adjusts for internal air pressure.
Your gear should fit snug inside the case. If it’s loose and flopping around while you carry it, you’re increasing the odds of damage. Use the dividers to adjust the case to the gear you’re carrying each time you load it. Not too loose, not too tight – just right!
When you’re looking at camera bags, try to plan ahead and think about any gear you’ll be buying the coming month or year. Think about what you have now, and what you carry most of the time. Think about how your photography might improve by having a case that holds your camera and extra lenses that you might otherwise leave at home. That’s the true value of a case.
Picking the Right Size of Camera Case
If you to have just one camera case, you want to pick a size based on two factors: how much of your gear will it hold and how convenient will be to carry. It’s easy to think you’ll buy a case that holds everything, but then maybe it’s so big and heavy that you never take it anywhere.
Think about the equipment you use most of the time. Is it the same gear you want to carry with you on a trip? Carry it through an airport? Put in the trunk of your car? Hike 6 hours with it? It’s always a fine balance between how much you want to take and how much you want to carry. Only you will know this answer.
The good news is that companies make camera bags in all shapes and sizes. From small pouches for your compact point and shoot to large roller bags. Take some time to review what is available and start first by picking the size you want then narrow it down.
Styles of Camera Bags
We’ll begin by looking at a few styles of smaller camera cases. These are perfect for a body and one or two lenses. Ideally, they should hold a couple of extra accessories like cleaning tools, memory cards and batteries.
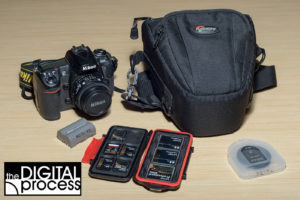
Holster – This is a popular style of small bags that is designed to hold a DSLR body and one lens (short zoom or two small primes). Some will also have a pouch on the front for accessories, and many will have a small compartment inside the top flap. Perfect for day trips. Many of these also have a belt loop.
These are great because they’re well padded, compact and the zipper keeps them moisture and dust tight. Depending on how you travel, you might need one with thick padding, or maybe one a little thinner and lighter. It’s not easy to buy camera bags online, but as I’ve recommended in other lessons check out a local camera store if you’re not sure.
Satchel / Shoulder Bags – The next one to look for smaller bags are the satchel style. There’s a few variations, but they all are designed to be worn over the shoulder with a top flap to access your gear. Some may resemble messenger bags or look more like the ‘classic’ camera bag design.
These are good because they’ll handle more equipment than a top loader and everything is easy to access. Most of these cases will hold a body, two or three lenses and maybe a flash – and have pockets for accessories.
Of course, satchel bags come in all sizes and some can be very heavy when loaded with gear. When you’re looking at this style make sure you can move the dividers and that there is adequate padding. With added gear these can get heavy so you want a wide padded strap that fits your shoulder comfortably.
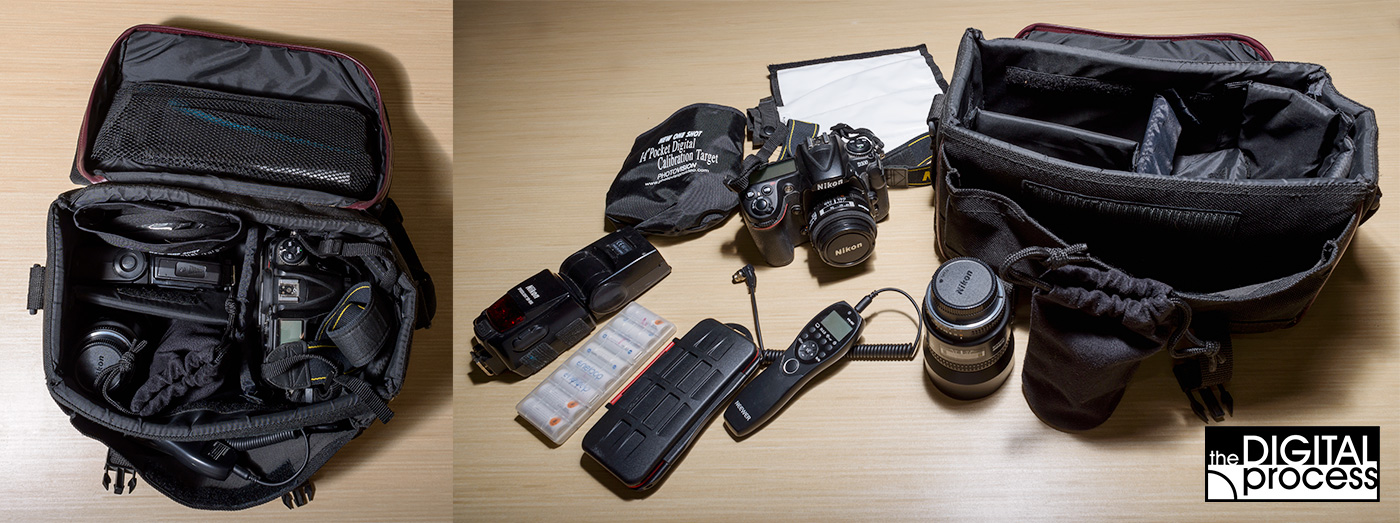
Here is a small satchel bag that I use for day trips or quick simple shoots. I can easily pack everything you see on the right, and I use a lens case as there is no divider between the lenses. Everything else in the main section is separated by dividers.
I’ve had this case for about 25 years; it’s a little worn, but still works like new. Now take a look at a larger bag of the same style.
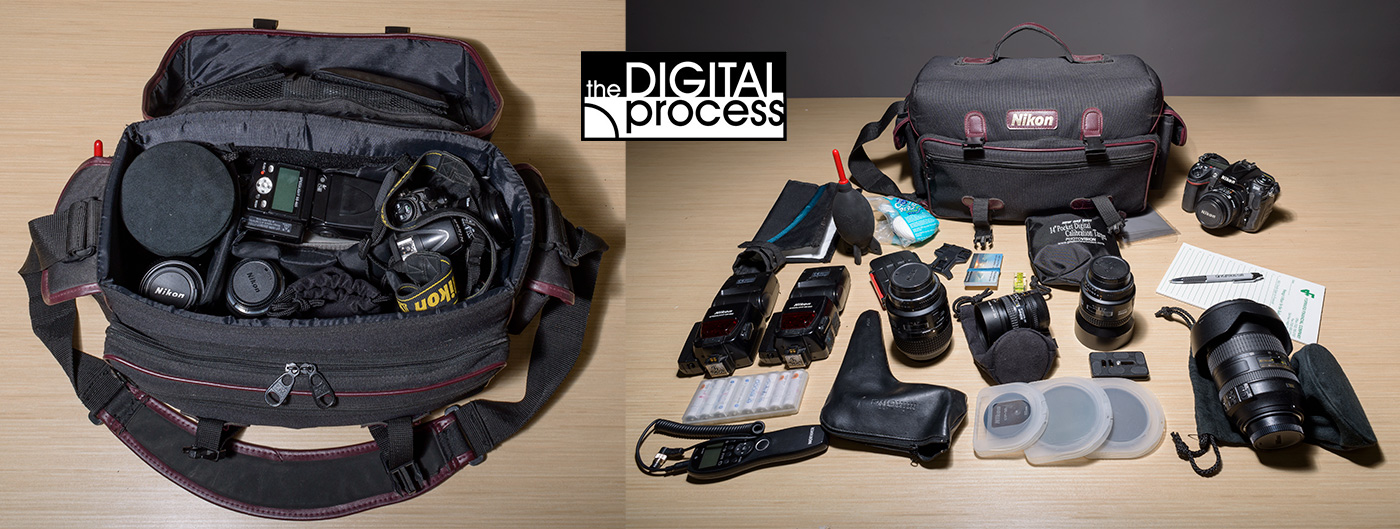
This next case is one of my favourite camera bags. It holds a lot, is easy to load for a quick shoot and has compartments on the front and sides as well as a zippered back compartment. The top flap has more compartments as well. Lots of Velcro on the inside, so I can arrange this for almost any gear.
I could have jammed some more in, but I think that gives you an idea of what a bag this size can hold. Loaded up, this weighs about 18 pounds (8.2kg) while the smaller satchel bag weighed about 9 pounds (4.1kg). If a 9lb / 4kg weight difference doesn’t sound like much, that about the same carrying 2 extra bricks around all day. It takes its toll on your shoulder after a while.
Note: When using a shoulder bag with a handle on the top, like these ALWAYS close the snaps and secure the lid every time you leave it so you or someone else doesn’t pick the bag up later and send all your gear flying to the ground.
(Yes, this has happened to me. More than once.)
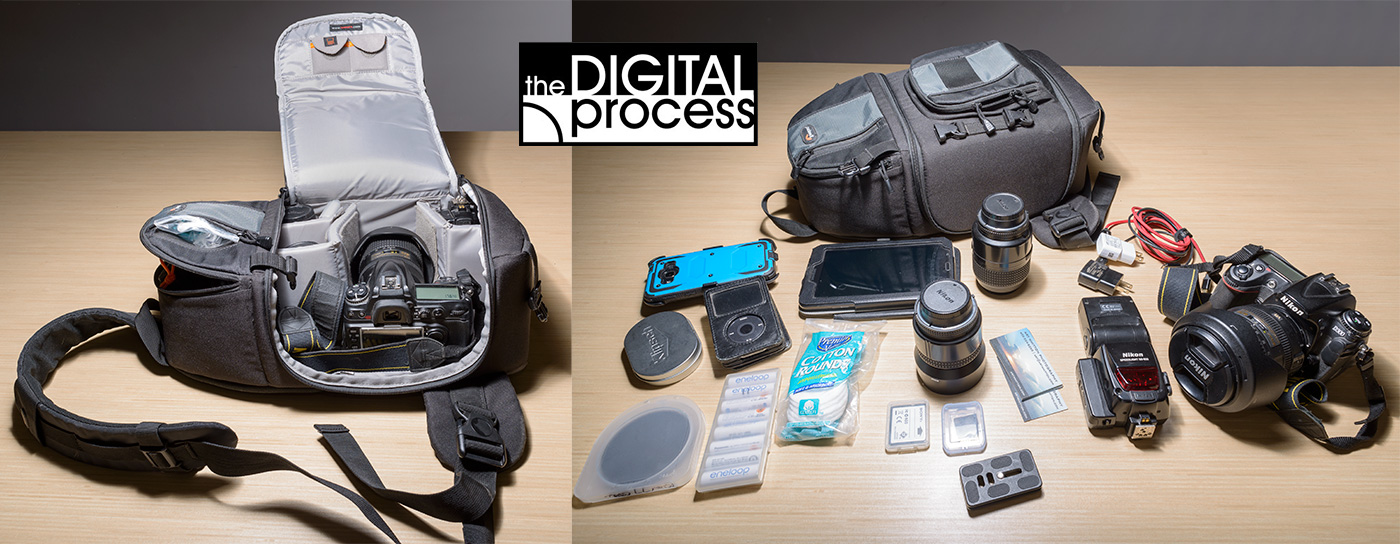
Sling Bags – A sling bag is a smaller backpack with just one shoulder strap. These are handy bags for travel, day trips and other short excursions where you have a small amount of gear to hold, plus some personal electronics. I use mine as a carry-on for flying, so I can keep track of iPod, earbuds, phone, 8″ tablet – and my wallet goes in here during security checks.
This model allows me to pack enough gear for a weekend shoot in a city. It has easy access while carrying it – just swing it around to the front and you can open up the side to get your camera and lens out while leaving everything else safely tucked away.
If you’re selecting a bag like this, make sure your camera and favourite lens will fit in the main section. I bought this when I had a D300, and the slightly bigger D800e makes for a tight fit with the padded strap I use. This bag loaded up the way you see above weighs in at 13.5 pounds (6.1kg). It also has the ability to attach a small tripod and the bottom section contains a waterproof jacket that can cover the whole bag.
Backpacks – When you’re needing to take a lot of gear and maybe a big lens or two, then you should consider a backpack. These come in a number of sizes, and the one you pick might depend on how you travel. If you plan on flying with a backpack full of gear, then make sure it will fit in the overhead compartment or under the seat. If you’re not driving, then consider how often you’ll be carrying the full bag as weight can become an issue.
I used this bag on a trip last summer. I flew to my destination and then traveled two weeks by car. This was a perfect camera bag for the journey. I didn’t carry the full load much – mostly in and out of hotels, but it held everything I needed. I used my sling bag as a carry-on, so I had the perfect bag for walking around with.
Although I didn’t pack my laptop on the last trip, this bag does have a section that will hold one. If you plan to take your laptop with you, double check that it will fit. This bag is ‘almost’ big enough to carry an older Dell 15″ laptop.
With all of the gear shown below, this bag weighs in at 32 pounds (14.5kg). That includes two large lenses, 3 primes, 2 flashes and a laptop, as well as the common accessories.
If this the style of bag you need, then check that it will comfortably hold your gear. If you go to look at these in a camera store, load it up with equipment so you can feel what it will really be like when you use it. With a bag this size that can hold a lot of gear, you want a quality bag. Don’t cheap out on these as the weight involved will test the stitching and materials every time you wear it.
If you take a big backpack on a trip, you can always put a top loader in your clothes luggage – just fill it with socks.
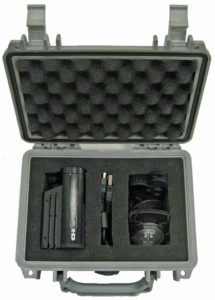
Hardshell Case – For the ultimate in protection, you’ll want to consider a hardshell case. These are designed to protect your gear from almost anything. If you are traveling with a lot of equipment and might have other people handling it, then a solid outer shell will really help.
These bags will come with either dividers or solid foam that is pre-cut into cubes. The cubes allow you to build custom openings for your camera(s) and lenses.
If you are going to get one of these, make sure it is water and dust tight. Many of these will also have a pressure valve which aids in water protection.
Personally, I haven’t needed a hardshell case, yet. I find that a good, well padded case will work for my needs. But then my bag is always with me and I don’t travel to extreme locations. I also hope I never end up in a situation where I need a fully water tight case!
Roller Case – When I need to bring a lot of gear and don’t want feel like a pack mule, I’ll use a roller case. This is just like your regular luggage, but with much better padding. The sides on this case are semi-solid and much firmer than a backpack. It’s also thicker than the backpack I have, so I have solid protection on all sides.
This model also holds my laptop easily, and has many pockets for accessories. With all of the equipment loaded in, this bag weighs in at 45 pounds (20.5kg), so the wheels come in handy. You can also find a combo backpack / roller bag for more ways of carrying.
Once again, this bag is designed to fit in most overhead compartments on a plane. This is important as you won’t want to check your bag full of your favourite (expensive) camera gear!
Other Cases
Don’t forget you can get cases for your flash or lens and protect them separately (or for storage). Many accessories come with a soft case these days, but if you buy a used item or just want better protection look into a new case. Look for belt loops on these for easier carrying and better access while shooting.
The same considerations apply to smaller cases as well, look for a quality products with good protection. Make sure your gear will fit or be sure that you can easily return the case if it doesn’t.
Summary
When looking for a bag, you need two things: protection and a quality build. You need padded walls and dividers. You want a well made bag that will not tear or fall apart in the middle of a two month trip. Depending on your destination, you want one that can be zipped up to keep the elements out. Only you can decide what kind of bag you need.
Your equipment will determine the size, your travel methods will determine the style. You might end up with two or three bags depending upon your requirements.
A solid, well made bag doesn’t have to be very expensive, but please don’t cheap out here. There are a lot of good brands to choose from, and when in doubt visit your local camera store and read reviews.
If you have any questions about cases, feel free to email me or leave a comment below. Thanks for reading – Art.

