Choosing a Tripod and using Camera Supports
Introduction
When it comes to tripods, there are a lot of choices out there. When I’ve been asked, “Which tripod should I get?” I’ve usually replied with ‘the best one you can afford‘ and then explained what the ‘best one‘ might be. Many people starting out in photography think all tripods are the same and don’t consider why they should spend more money on one over a different model. This lesson will explain some of the things to look for when buying a tripod and what your priorities should be. I’ll also give some great tips on how to use your tripod once you have one.
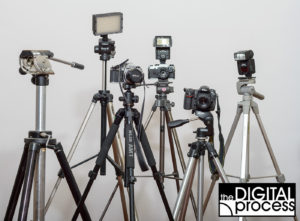
A tripod really consists of two things: Legs and a Head. The legs are the three vertical supports while the head can be permanently attached or (usually) separate and interchangeable. You can mix and match brands and buy one brand of legs and different brand of head. This is great because you can upgrade one or the other as you need to. Read on and find out how choosing a tripod is not the a difficult choice.
This lesson will also look at other types of supports like beanbags, minipods and monopods.
Why do you need a tripod?
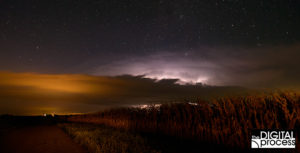
There are two main reasons why you need to use a tripod. The first reason is to keep your camera steady during long exposures or during any shutter speed that might induce camera shake. The second reason is to keep your camera in one place so you can concentrate on your photography. If you are in the studio, you might not want to hold on to the camera while also adjusting flash units. If your subject is one place, keep your camera in one place.
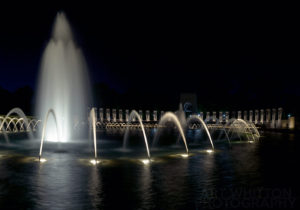
Sometimes you’ll just want to take photos at night and you’ll end up using either very slow shutter speeds (and a tripod) or a high ISO (and get a lot of noise). Choosing a tripod for the right situation will help you get the best photos and enable you to get photos you might not otherwise have a chance to capture. The photo above could not have been shot without a tripod because I can not hold a camera steady for 2 seconds. I shot this photo using a lightweight travel tripod I packed on a trip to Washington DC.
When I’m in the studio and shooting a still life, artwork or some other stationary subject, I’ll use a tripod. Once I have the scene set and the camera in place, I’ll work on the lighting. Having the camera locked into one position also allows me to combine more than one photo. With a tripod I can do special tricks like focus stacking for macro subjects. Macro is another area where tripods are very handy as the closer you get to your small subject, the more camera shake becomes a problem.
If you shoot a lot of landscape photography, you likely enjoy using small apertures for the greatest depth of field. When you do this, your shutter speed slows down and guess what? You should be using a tripod! Once you start getting used to the sharpness from a wide depth of field and steady camera, you’ll be hooked and start using a tripod more often.
Many people will try to take photos at a slower shutter speed than they should. Remember the 1/(focal length) rule of shutter speeds? This means you should not hand hold a shot at a shutter speed slower than 1/(the length of your lens). For example, if you use a 50mm lens, your slowest hand held shutter speed should be about 1/60s. Of course new advances in image stabilization have changed the game, but for the sharpest photos you don’t always want to rely on this technology.
If you use off camera flash, it’s good to have extra tripods to use as light stands. These don’t need to be a steady as your ‘main’ tripod, but we’ll look at these in this lesson as well.
Another great reason to use a tripod is that it can slow down your photographic process. It makes you stop and think about the scene in front of you. With you camera on a tripod, you will usually take more time to consider exposure, depth field and composition. Use this to your advantage and make some great shots!
Bottom line: if your photography involves slow shutter speeds, night photography, studio work or macro photography – you need a tripod.
What to look for in tripod legs
When I’m looking at tripod legs, I have two major considerations. I want to see how sturdy they are and I want to see if they can be adjusted quickly. With a little research you can get a good idea of how sturdy a tripod can be. For ease of use, this is subjective, and what works for one person might not work for the next.
If you are a tall person, you might also want to check to see how high the tripod legs can be extended. An afternoon of landscape photography hunched over a short tripod isn’t a lot of fun. Conversely you want to see how low a tripod can go for those great low angle shots.
Personally I like the “lever lock” system on tripod legs. This is a single lock that flips out to loosen the leg and flips back to lock it. It’s quick, easy, and you know when you have it in either position. Other tripods might use screws to lock the legs (slower) or lock collars (slower) and with both these methods, you can’t instantly tell what position they are in. Not having a leg locked can lead to your tripod falling over when you add weight (your camera).
Here’s a short video that shows how two different tripods handle vibration. This is an extreme example with me stomping my feet next the tripods as I shot the video. This was on a hardwood floor, so the vibration carried from the floor to the camera (and shows why you should tread softly when shooting).
Tripod legs have extendable sections, usually 3 to 5. The lower number of sections you have, the less joints you have and the less potential parts to break and it’s generally more stable. The higher number of sections you have usually means your tripod will condense down to a smaller size. My main tripod has three sections and two locks per leg. My travel tripod has 4 sections with 3 locks per leg. This allows it to collapse down and fit in my backpack.
If you are shopping for tripods online you need to look at some specs. Here’s a table that compares a few tripods currently available (April 2017).
| Model >> | Slik Travel Tripod | Manfrotto Compact Tripod | Benro Carbon Fiber Tripod | Gitzo Traveler Kit |
| Max Height | 57.9 inches | 65.74 inches | 61.4 inches | 64.4 inches |
| Min Height | 10.1 inches | 18.30 inches | 20.7 inches | not listed |
| Max Load | Not listed | 6.61 pounds | 26.5 pounds | 22 pounds |
| Weight | 3.5 pounds | 3.06 pounds | 3.15 pounds | 3.2 pounds |
| Leg Sections | 4 | 5 | 4 | 4 |
| Price (as of this writing) | $79.99 | $89.93 | $280.00 | $599.99 |
As you can see, when it comes to choosing a tripod, you have a lot of options and a wide range of prices.
Here’s how to narrow it down.
Travel or Regular – a travel tripod will be lighter and more compact, but generally might not be as steady as a similar price range regular tripod.
Aluminum or Carbon Fibre – The newer carbon fibre tripods are much lighter and this is a huge benefit for anyone carrying one all day. More expensive, but lighter.
How tall – I’m 6′ tall and like to have a tall tripod, so this is something I look for, but I’ll make a sacrifice for a travel tripod
Video or Still – This lesson is more about photo tripods, but if you do a lot of video work, look at video heads, dollys and other features to help with video shoots.
Number of Sections – You might not think there’s a big difference between 2 locks and 4 locks, but if you’re in a hurry and need to unlock and lock 12 locks in stead of 6, it can add up. Again, a travel tripod will usually have more sections to make it more compact.
Max Load – if you use large telephoto lenses, this is an important spec to review. You want to make sure your tripod will support your big expensive lens. Use this spec as a guide to general sturdiness.
Removable Head – I strongly recommend that you get a tripod which allows you to change heads. You might not do this for a while, but it’s a great option to have. You can always get a better head or use a video head when needed. You can buy good, stable legs now and less expensive ball head, then upgrade the ball head when you’re ready.
Feet – Many tripods have adjustable feet that go from a rubber foot to a spike. This allows you to use the tripod in any terrain and keep it stable.
If you haven’t bought a tripod before, it might be worth going into a local camera store and checking some out. Take your camera with you and try them out. Bump them – lower them – raise them – put a tripod through its paces and you will soon find out if you like it or not. If the store has one you like, support them and buy local.
Build quality is important if you plan to use your tripod, so don’t cheap out. Consider how a cheap, flexible tripod might sway in the wind or succumb to minor vibrations.
Look for other factors like like legs that swing out. Look for a centre column brace for added steadiness. Some tripods have a centre column that can be inverted for low level shooting.
What to look for in Tripod Heads
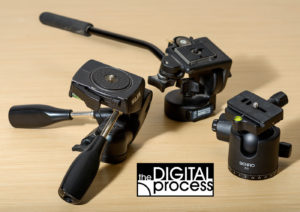
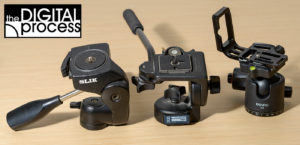
When if comes to choosing the right head, you need something that is easy to adjust, is firm and fully adjustable. Personally I like ball heads. They allow me to adjust the camera to any position, but they’re quick and simple to use. You can also get a head that will have one to three handles (or levers) called a pan head or pan and tilt head. These work very well, but to get your camera into position, you’ll need to make three adjustments, while you could make one with a ball head.
If you shoot a lot of video, you can get a video head and use it for still photography as well. A good video head will have fluid motion and sometimes you might not lock it down securely for still photos. If you can only afford a single good head, choose the still or video option depending on what you’ll be shooting most often.
You also want to make sure the head you buy has a quick release. There are many times when you’ll want to change from shooting on the tripod to quickly hand holding or vice versa. Having a quick release saves a lot of time. The other option is to unscrew the camera from the head each time you take it off. If you use the tripod a lot, you can just leave the quick release plate on the base of the camera.
Just like the tripod heads (and almost everything else in photography gear), there are large differences in quality and generally you get what you pay for. I’ve worked my way up over the years and now have a ball head (Benro G3) that I really enjoy using. My previous one worked well until it started locking up at random times, but at the time it’s what I could afford.
I use my tripod a lot for macro work, so a ball head allows me to make small adjustments quickly. I’ve had heads before with three handles and they worked fine, but I got tired of having to adjust each axis individually, then make small adjustments to fine tune the final setting. I’ve used the older ‘trigger’ style as well, but found they didn’t fully lock into the place where I was expecting to, so again, final adjustments were needed.
Choosing the right head
First decide on the style you like to work with, generally this will be a ball head or pan head. Be sure to check the rated ‘max load’ specification, especially if you have large, heavy lenses (or plan to buy one). Make sure you can get extra quick release plates in case you want a back up or lose the original, or keep them on multiple cameras.
Most tripods use a 3/8″ thread on the top of the legs to attach most heads with a matching female thread (some use 1/4″). Make sure that you legs and head will match up. You can also get thread inserts to adapt a 3/8″ female thread to 1/4″ if needed. Note: Don’t confuse this with the standard 1/4″ thread that is used to attach the camera.
Once again, if you are new to tripods, go to a local camera store and try out some options. How you work with a tripod and head is a personal choice, and you should be comfortable with it. Check to make sure you can adjust the head to point the camera in any horizontal or vertical position.
Specialty Tripod Heads
If you use your large lenses often and need more freedom of movement, look into a gimbal head. These are designed to provide ultimate flexibility when your subjects are fast moving like sports or wildlife.
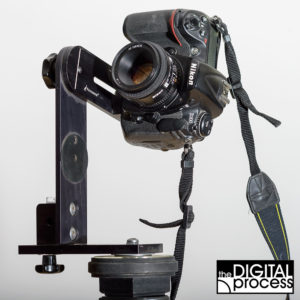
Another specialty option is panorama or nodal point heads. These are designed for shooting multiple images that will be merged into a single, large panorama image. You can shoot panoramas with a regular head, or even hand held, but with a nodal point style of tripod head (shown on right), you can have subjects very close to the camera and keep everything perfectly aligned.
Video heads come in a wide range and can be incredibly expensive. A fluid head may or may not actually have fluid in it (springs, plates, gas, other options) but the goal is to have a fluid motion while changing the direction of the camera for smooth pans while filming. Video heads like this will generally have a longer handle so the user can gain more control.
Choosing a Quick Release
In most cases, the quick release will be a small part of your decision when choosing a tripod and head combo. What I look for in a quick release is something sturdy, large enough to support a camera or large lens and a secure way to tighten the plate to the camera. I like to have a metal plate rather than plastic for added security. As mentioned earlier, check to see if you can easily get a replacement plate if needed. If you can’t find one when your head is new, you will have a harder time in 3-4 years when you really need one.
You might see a name pop up when looking at tripod heads called “Arca-Swiss“. This is an industry standard system that uses a sliding plate and locking method. This is a great, secure system which also allows for fitted plates based on individual cameras. Most of the higher end heads will use this Arca-Swiss style and it works very well. The photo above shows my Arc-Swiss angle bracket on the right. This is great for quickly switching between landscape and portrait orientation.
Setting up your Tripod
So now that you have your shiny new tripod, you should know that like every thing else in photography, there’s a few tips and techniques you should follow to get the best results.
If you are not using the maximum height, extend the larger top sections first as they are more stable. Use the centre column last. Extend all of the legs sections for maximum height, and if you need more, then extend the centre column as it is the least sturdy part of the tripod. Speaking of the centre column, unless you have a specific reason, keep it perpendicular to the ground. If the centre column is at an angle, your tripod may not be stable.
Get into the habit of checking for sturdiness before attaching your camera. I’ll usually place my hand where the release plate goes and put pressure down on the tripod and give it a little shake. Every now and then I’ll find that a leg isn’t properly extended or locked. This is just a good way of finding out if your support isn’t steady before locking your expensive camera to it.
Hang onto the camera strap or leave it around your neck while attaching the camera to the head. You might ‘think’ you have the camera securely attached when you might have forgotten to tighten something. If you are new to using tripods, start this habit on day one. You’ll thank me later.
If you can avoid placing your tripod in salt water, that’s great. Sometimes you just NEED that special spot or angle and that involves you getting your tripod wet. If you do get the feet wet with salt water, be sure to rinse that area with fresh water as soon as you can. Even if you placed the legs in fresh water at a lake, it might still be a good idea to rinse afterwards.
If you have adjustable feet, don’t forget about them. If you use your tripod mostly inside, you might forget that you can adjust the feet to get better grip in dirt or sand. Always try to get the most secure footing. One leg slipping on a wet rock can send all of your gear flying!
Don’t over-tighten. In some cases you might try just a little too hard to make sure everything’s secure and you start to oven-tighten the legs, or the pan handles or ball head knobs. With most equipment, you don’t need to turn anything much past a solid finger tightness. It’s a fine line that you will learn the more you work with your tripod, but over-tightening can damage your equipment or make it VERY hard to release when you need to make adjustments.
Check that you are level. Many newer cameras have a built in electronic level. If you’re using a tripod outside, use this feature if you have it! If not, you can get bubble level adapters that fit in a hot shoe. Many heads also have a bubble level built in. Use these so you don’t have to straighten your images out later.
If you have a large lens with a separate tripod mount, use it. It’s there for a reason – to support the heavier lens and not place undue stress on the camera mount. You’ll get better support and sharper images as well. This also keeps the camera/lens combo centre of gravity over the middle of the tripod.
Many tripods allow you to attach a weight to the bottom of your centre column. If you have that option, consider attaching your camera bag for added stability.
Shooting with a Tripod
Now that you are past choosing a tripod, have bought one and you’ve learned how it works and have it all set, here are a few final tips for shooting while using a tripod.
Find your scene and frame it before putting your camera on a tripod. It is VERY easy to mount your gear on a tripod and start shooting at the first place you plunk it down. Once you are set up, it’s human nature to get locked into one way of looking and thinking. Compose your scene, find the right angle, choose the best height to shoot from – THEN set your tripod into position.
Turn off any image stabilization controls. If you lens or camera have any kind of vibration reduction settings, make sure they are turned off. Now that your camera is on a tripod and stable, you don’t need them. Also these settings can actually make your images blurry by trying to correct for movement that isn’t there.
Turn off Auto ISO. Your camera is nice and secure, so you can use slower shutter speeds. Set your camera to its base ISO setting and enjoy the benefits of the great sensor you have.
Control your depth of field. If you are shooting a landscape, you can easily shoot at f/11 or f/16 and get a huge amount of the scene in clear focus. Unless you have a lot of movement in your image, your shutter speed is less of a concern now. Take advantage of one the big reasons for using a tripod – you can use the settings you want for the scene and exposure to MAKE an image and not just take one.
Use a cable release if you have one. When you buy your tripod, consider getting a cable or remote release at the same time. Even with the best technique, pressing the shutter release button can introduce some movement. Using a cable or remote release gets rid of this last possible camera shake. If your camera has an option to lock the mirror up before shooting, use it. This will eliminate vibration from the mirror slapping up and out of the way. If you don’t have a cable release, use the self timer at a 2 second delay.
If it’s windy out, your camera strap will make a good sail. If it’s blowing hard enough, the wind will catch your strap and cause camera shake. I use a strap that has a quick release on each end so I can easily remove the strap when needed. If you can’t easily remove the strap, bundle it up in your hand and let a little slack sway in the wind rather than the whole strap.
After you’ve taken a few shots and reviewed your histograms and think you have the best shot, take a moment to review the scene and your composition choices. Check the image at 100% in your viewfinder to review sharpness. Maybe your first choice wasn’t the best. Maybe the light has changed while you were shooting. Look at other angles, consider a different lens, take a deep breath, close your eyes and get a fresh look.
Other Types of Supports
After tripods, the next most common type of support is the monopod. All of the same rules apply, but instead of three legs, you have one. Monopods are used when you still need extra support, but can’t use a tripod.
If you are shooting action, like on the sidelines of a sporting event, you need to move around quickly and a tripod can get in the way. Using a monopod still gives you great support, but with added agility to move around much quicker.
Also, there are many places that do not allow tripods. Many public areas that attract large crowds will prohibit tripods for safety reasons (they don’t want people knocking over your expensive gear). Most of these locations will allow monopods, though. If you are going to shoot in a crowded area, it can be worth checking out the rules before you go. I’ve tried setting up my tripod in an out of the way spot in the Venetian Shopping area in Las Vegas and been quickly told that was against their rules. A popular bird blind tour in Nebraska does not allow tripods, only monopods (along with other rules).
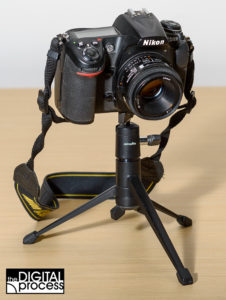
Table top tripods are a great portable option. These are usually less than a foot tall, and vary greatly in their ability to do the job. A cheap one might actually be worse than nothing at all if it falls over and breaks your lens. I’ve packed mine on many trips to have ‘just in case’.
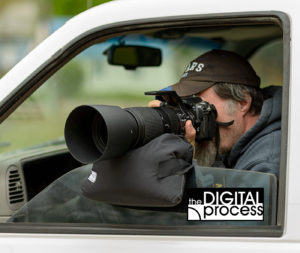
Sandbags are great if you are shooting out a car window or over a rock, or a car hood or a number of other situations. Sandbags provide a soft support for your lens or camera and be used when a tripod won’t fit or otherwise work for you.
Sandbags can be filled with sand (obviously) as well as rice or beans or even small plastic pellets. I use rice in mine in case I ever need to empty some out, I don’t want to spill plastic beads anywhere. Sandbags can also be used as a weight for the centre column on your tripod. I prefer sandbags over window clamp mounts as I can move the camera much quicker. I’m usually shooting wildlife out my car window, using the car as a big blind, so the sandbag is very flexible for this.
Other Camera Supports
There are of course many other types of camera supports, like a chest support, or Steadicams for video – but I really don’t want to cover them all here. You might find that for your particular style of shooting you need a unique piece to support your gear. You might want a suction mount for your car or maybe one of the flexible leg tripods you can wrap around any object like branches.
Summary
The biggest thing to remember is that tripods and other forms of support allow you to get the best possible photo by allowing you the greatest range of camera settings. Remember the guidelines for choosing a tripod and pick the one that best suits your needs and budget.
Remember that just sticking the camera on a tripod isn’t the end of the process. Use the tips above to get the sharpest images. Look into alternative options for keeping your camera steady and think about how they will help your photography.
The most important rule of all: take your tripod with you! Even if I’m not traveling, my travel tripod stays in the car. It doesn’t take up any room, so I just leave it there. My sandbag is always in my truck, since that’s the one I use for driving dirt roads on wildlife hunts. I have a few tripods in my studio for my camera, for the flash units and to hold reflectors.
I hope this lesson has helped you think a little deeper about tripods and camera supports. Please share it if you found it useful. If you have any questions, feel free to email me at info@TheDigitalProcess.com or leave a message below.
Thanks for reading – Art

