Introduction to Still Life Photography
I really enjoy setting up and then shooting some “still life photography“. Some are more complex than others, but the approach is usually the same. The other thing that happens in each shoot is that the first images are not the best. It’s only after shooting, changing angle or subject and looking at the photos on my screen that I’ll get to the end of road.
Here’s a simple tutorial that will help you start working with still life images.
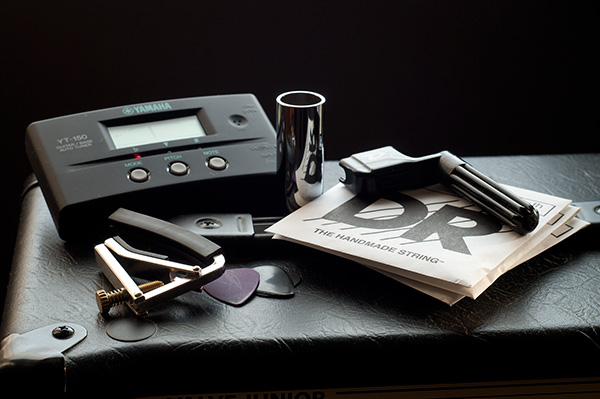
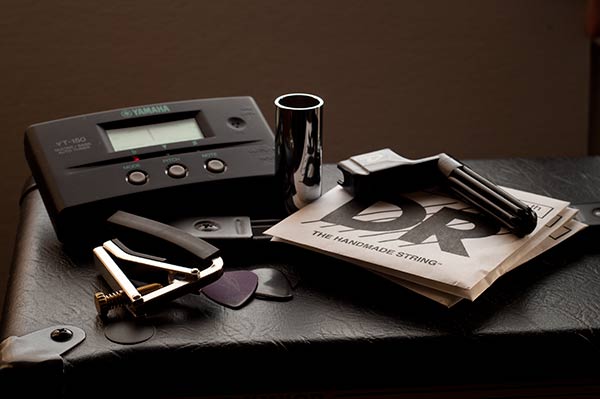
This is the image that I ended up with to use as an example:
It’s a collection of items with a common theme – guitar. It might look random, but I set up a few items, arranged them in an order and then shot them. Then I shot them again, and again.
This post is about what decisions I made along the way, and how I ended up with this image.
Equipment for still life photography:
- Nikon D300 with a 50mm 1.8 lens
- Tripod.
- Spare piece of matte board (reflector).
Lighting
- Window with plastic covering (to keep the cold out but works as a great diffuser!)
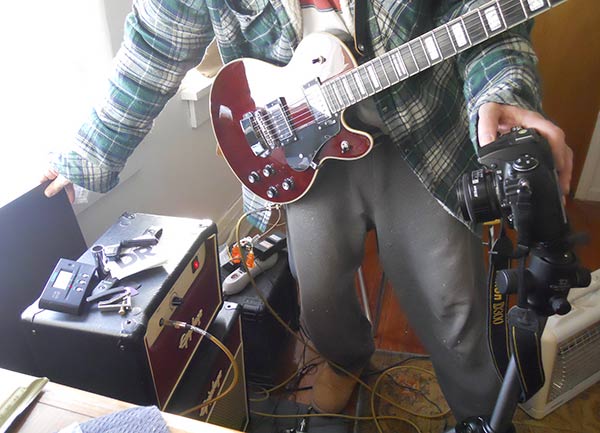
As you can see, I didn’t use any fancy equipment or studio lighting set. In fact, here’s the secret to my ‘studio’:
There I am in my grubby ‘work’ clothes. The items are sitting on the amp that I use, but have been re-arranged for composition’s sake. Yes, I know it’s glamorous, but I like to show off.
I also have my guitar on and plugged in because I wanted a light showing on the tuner at the back. I’m holding my reflector card – but I could have spent 30 seconds and taped in place. I could have used a remote camera release, but was too lazy to grab it. Hashtag: #worldslaziestphotographer
Setup
I had decided that I wanted to shoot a still life, so I needed a subject. Since I’m a beginner guitar player (that’s my Hagstrom Swede in the photo) – I thought that some guitar accessories would be fun to shoot.
I wanted a stable and interesting surface, so I thought that I would use my amplifier head. The best part was that it was close to a window so I didn’t have to move it. An added bonus was that I have covered the windows in plastic to help keep out the cold Nebraska winter and this helped to diffuse the light.
So now I had my subject and my lighting. The next step was to start shooting.
The Process
I know that the items were small and that I would be close to them when shooting. I picked up my trusty 50mm f1.8 and mounted it and put my camera on the tripod. The big question was – “What is my focal point?”. I thought that the cord coming out of the amp looked neat, so I lined up my first shots.
This is a pretty dull shot. To get the cord and the accessories in on one shot – I needed to go vertical (portrait mode). This added a large range of exposure to the image. It also did something that I didn’t notice until I looked at the image on my monitor: I had cut the image in half! Notice the black line that crosses the frame? This was a no-go.
The Process – Take 2
Well that didn’t work at all – so I decided to focus on the accessories. This is how I first arranged them:
Ok – now I’m getting somewhere. The challenge here is that I have a very light item (string envelope) and a very dark item (tuner). Maybe if I expose the image more and turn the tuner on, it will get more interesting?
Ok – I can start to see where I’m going with this – nowhere! I better change tactics – and FAST!
The big problem is that tuner at the back – maybe if I lay it down, it will look better?
Ok – it’s a little better.
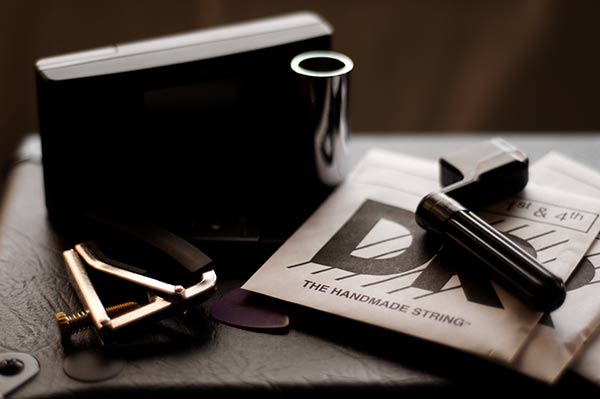
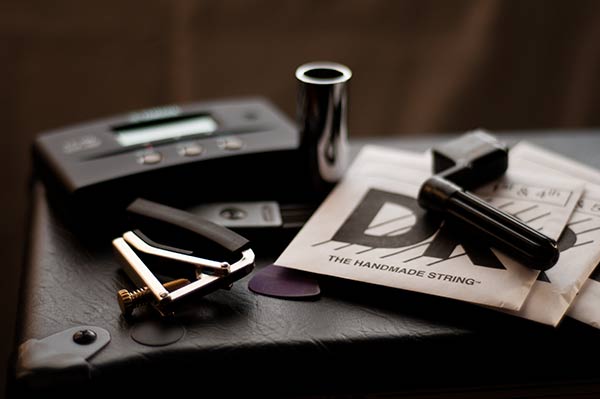
I’m going with a shallow depth of field to focus on the label on the string envelopes. F1.8 is enough to give shape to the other items, but not define them.
So I’m getting close. For all of these shots I have been holding a section of matte board up to reflect light from the window back on the objects. Maybe if I propped up the tuner so that I could see more of it.
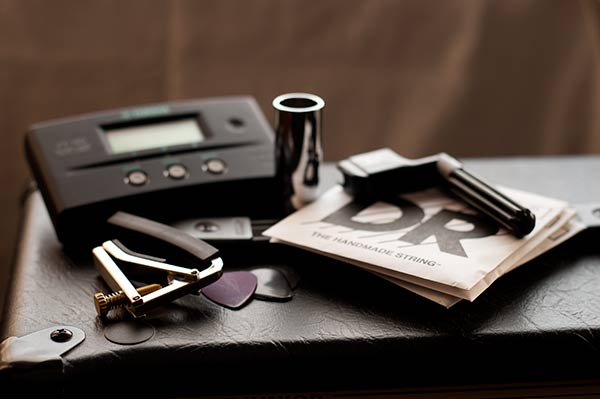
I think I’m heading in the right direction now – what if I increase the depth of field?
This looks better – maybe being able to see the tuner isn’t a bad idea after all.
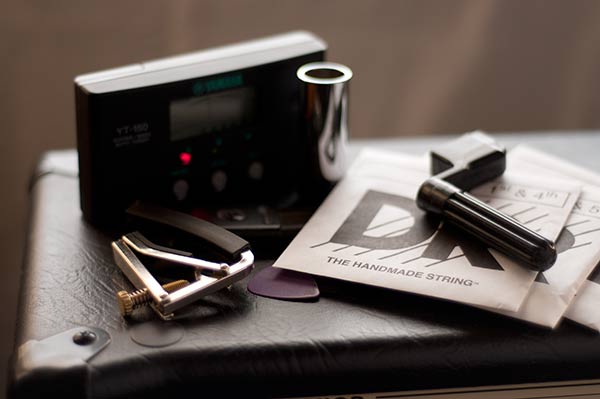
Now I’m thinking that the background (the white side of the matte board) can be improved. And just by turning the matte board around to show the dark grey side – I get my final image:
This process took a while, but if I had just stuck with the first image that I composed, I wouldn’t have been happy with it. By looking at options and making small adjustments along the way, I ended up with a photo that I enjoy. Since I shoot in RAW format, I only needed to change the White Balance to Daylight, resize the image and I was done. No corrections were made otherwise.
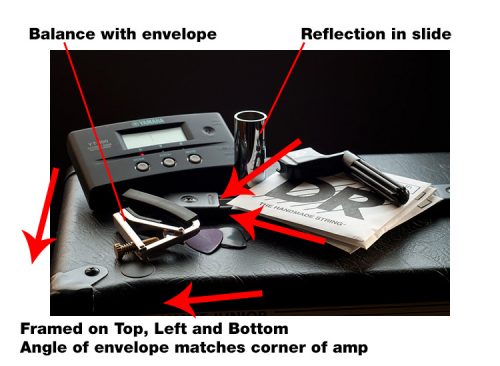
Finally, here’s how I look at the composition of this scene and why I stuck with the choices and layout I made.
Composition Breakdown: One thing I always try to achieve in my still life photography composition is to get the viewer’s eye to travel around the image, but not leave it. I have a strong visual frame that surrounds the image – the darkness on the top allows space so that we don’t feel confined. The dark areas on the left and bottom match to keep the eye from leaving the frame. The angled lines in the bottom left corner are somewhat repeated by the corner of the paper envelope. I have a subtle reflection on the slide (metal tube). The tuning key on top of the envelopes keeps them from being too bright and distracting. The capo (metal thing on the left) has some light areas that balance with the white envelopes. The picks in the middle add some visual interest to keep your eye wandering around and looking a little deeper. Finally the tuner at the back gives a bit of a focal point to the image without overpowering it. The red light adds the only bright colour in the frame, but you have to hunt for it. This is just a simple still life photo, but there is a lot visually that is happening in it.
If you have any feedback about this post, please leave a comment below – or e-mail me.
For another approach to lighting a still life set up, check out my guide to “Light Painting“

