5-8 : Gradient in Photoshop, Fills and the Eraser
Introduction
This tutorial deals with two ways of filling selected areas – with a solid fill or a gradient in Photoshop. It will also introduce the Eraser tool. These tools (Fill, Gradient and Eraser) get used a lot, so they deserve their own tutorial. These tools are used when you have a large area in an image that needs to have color. You can also review this tutorial with the video at the bottom of the page.
Paint Bucket or Fill
The Fill tool is on a flyout with the Gradient tool. Both can be accessed by pressing “G” at any time.

To see how easy it is, start a new drawing. Select your favorite color. Now select an area as shown in Tutorial 5-3 or 5-4. Make the Paint Bucket Tool (“G“) active. You’ll see that the cursor changes to a little paint bucket. Place the paint bucket into the selected area and left click. The selected area will now be the current foreground color. That’s the easy way.
You’ll also notice that when the fill tool is selected, you see more options in the option bar.

From the left is the flyout for presets, then a droplist between using the Foreground color or a pattern. If you choose pattern, the list of patterns is shown in the flyout to the right. After the pattern flyout is the Mode Selection droplist. This droplist is used in many tools and will be covered as needed in separate tutorials. Next is Opacity (which you should know about already). Tolerance is applied just like when you used the magic wand tool, as are the next 3 check boxes.
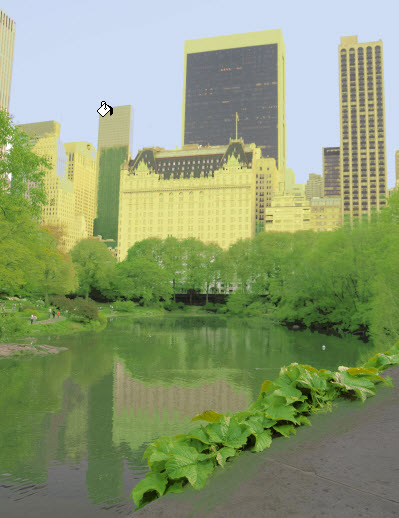
Now open up a photograph. If you don’t have one, you can use this image of Central Park in New York City. Now when you use the Paint Bucket, you don’t need to select an area (although you can). If you are using the Central Park image, you can select the sky area and change it to a different color. This is because most of the sky is close to one color. If you click on one of the buildings, you’ll see that only part of the building gets filled. With a few color changes, low opacity adjustments, and some clicks you can transform an image.
The closer the colors are to the same value, the lower the tolerance needs to be set. The higher the color contrast, the higher the tolerance setting.
Gradient in Photoshop
The Gradient Tool allows you to create a subtle blend of color in an image. This can be as simple as a color fade out to a complex blend of many colors to create a chrome look. Below are the options available on the gradient tool.
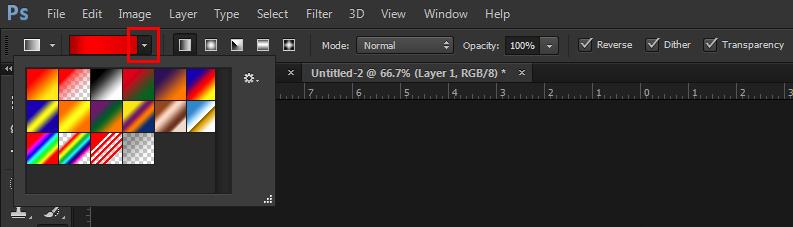
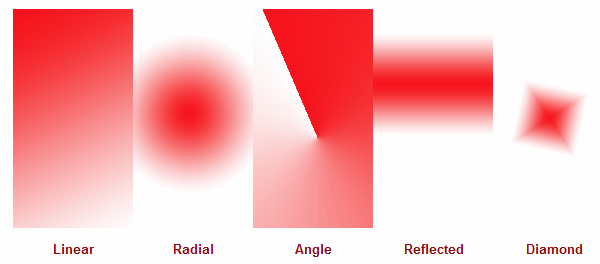
By now, you should be familiar with some of these options. First from the left is the presets flyout, followed by some predefined gradients (that you can edit or add to). After that is a choice of 5 different gradient directions. Followed by Mode, Opacity and Reverse (change direction of gradient). The next box is dither – check it to get a smoother gradient. The final option for Transparency is different that Opacity and deals with masks (which is covered in a later tutorial). Below are examples of the 5 gradient angles.
Start a new drawing and select a new foreground color. Using the defaults, just click and drag your cursor across the image. You will see a small cross hair symbol with a line attached to it to show you the angle and the direction of the fill. This is how you draw a gradient. The length and angle that you drag will determine how the gradient looks.
Warning: The gradient tool is very handy and kind of fun. It is tempting to get carried away and use it far too much in your designs. This is a common noob thing to do.
Creating a new Gradient in Photoshop
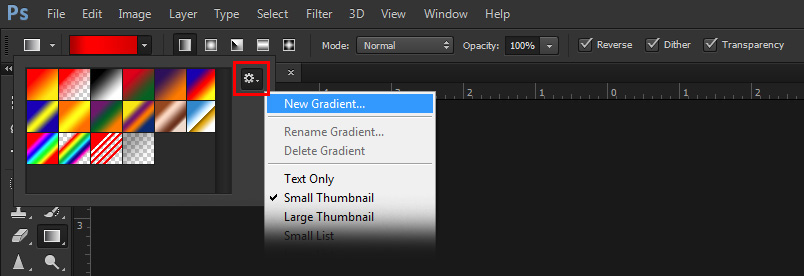
As you might have noticed, there are only a handful of standard ones to choose from. In most cases you’ll want to create a custom gradient. The good news is that it’s easy to do. Pick on the flyout for the standard gradients and then pick the ‘sub’-flyout for New as shown below.
Once you select ‘New Gradient…‘ – you’ll need to give a name. For now, just make something up. After you give it a name, you will see you’ve made a copy of whatever gradient was current. Click on this one. Now it is your current gradient. If you create a gradient, it will look just like the one you copied. To edit it, you need to click on it at the top in your option bar. When you do this, it will open this dialog box.
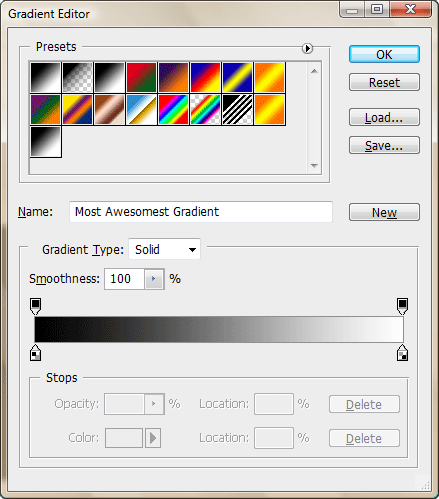
What you see is a color bar that has sliders on the top and bottom. The bottom sliders are for selecting and moving colors, the top sliders are for adjusting where the gradient blends. Move your cursor to the bottom of the slider and left-click. You’ll see that a new color box has been added that you can slide to the left and right by clicking and dragging. If you double click on the box (or click the color box at the bottom), you will see a color selector dialog box come up. Select the color you want to add to your gradient and press ok. You can add as many as you want. If you want to remove one, just click and drag it to the bottom of the dialog box and it will disappear.
You can add gradient points at the top of the slider using the same method. For these you don’t select color, but slide them adjust then to fine tune your gradient. Delete them by dragging them to the top.
Once you’re ecstatic about your gradient, tell your friends what you just did. Then click OK to close the dialog box. Now you can use your custom gradient like any other.
Erase Tool
The erase tool does exactly what you think it will do… it erases. You can select an area and it will only remove the pixels within the boundaries of the selection, or you just start erasing all willy-nilli in your image. The Erase tool also has a number of options.

By now, you should know what these do. You’ll see that they’re very similar to the Brush Tool options. Using the Erase Tool removes color on the current layer and exposes the background color set when created the file or the layer underneath..
Note: If you want to erase part of a photograph, you will need to change the base layer name from Background to a new name.
Conclusion
Using the Fill and Gradient Tools is quite common when creating graphic designs. They aren’t used as much in photo editing. Learning to use them quickly and tastefully will help you make some exciting designs. Practice with them because as a photographer, you’ll likely be needing to learn some graphic design tools as well. The Erase Tool is an important modifying tool in its own right. Get use to the different settings, especially with the hardness. Use it in conjunction with the Selection Tool and you’ll be able to work with specific parts of an image.
Reference
Look at the crazy math behind gradients
NEXT LESSON >