How to Shoot Lightning
Lightning storms are very dramatic. The power of nature can be overwhelming and as photographers we love to try to capture that majesty in our cameras. Thanks to digital technology, it’s easier than ever. This post will show you the simple steps about how to shoot lightning.

First things first – shooting in a lightning storm can be VERY dangerous. If you’re not sure what you should be concerned about, please watch this video regarding safety:
With that out of the way, lightning is fun and fairly easy to shoot!
This post is describing how to shoot lightning at night. Shooting in the daytime is tougher, but not impossible. You can get a Neutral Density filter that will block the amount of light coming through you lens, and you can follow this settings. Or you can buy a lightning trigger to fire your camera each time lightning strikes.
Gear Needed
Here’s what you need for equipment to get started:
Digital Camera with manual settings
Wide Angle Lens
Tripod
Cable or Remote Release
Camera: You need a camera that allows you to set the shutter speed and aperture manually. If your camera does this, then it should allow you to set a white balance as well.
Wide Angle Lens: As lightning can strike anywhere in the sky, I like to use a wide angle lens (14mm, 20mm, 28mm) to get as much of the sky into the frame as possible. I can always crop my image later if I need to, but I hate to get half of a huge strike because my lens wasn’t wide enough.
Tripod: You always want the sturdiest tripod you can afford and when you’re shooting lightning, that is doubly important. Remember, if there’s a storm that’s producing lightning, it’s likely producing wind as well. Wind can blow and vibrate your tripod and camera – so make sure you are as steady as you can be. Remove your camera strap as that can get caught in the wind and shake your camera.
Cable or Remote Release: A release isn’t 100% required, but it sure makes the shooting go a lot easier. Rather than constantly hitting the shutter button (and bumping the camera) you can sit next to the camera and just press the button on the release. Some releases also have an intervalometer (more about that later).
Location
When you are shooting in stormy weather, your safety is paramount. Dead photographers can’t sell prints no matter how awesome the image is. Check your local radar. See what direction the storm is coming from and how fast. Now you can plan your shot a little. If the storm is coming from the south (common in my area) I will try to find a location with something of interest that is between me and the storm. I live in a very rural part of Nebraska, so this isn’t always easy. (In fact, it’s darned hard at times!)

If there is rain coming with the storm, you need to make sure you and your equipment will be able to stay dry when the rain comes. Also, many thunderstorms will produce hail, so have a place you can run to if the hail starts pounding.
If you just want to practice, try shooting in a doorway or through a window if you have a clear view. This is an easy way to ensure you and your gear stay safe. I shoot a lot of storms from my front door.
With smartphones these days it’s easy to have an app that will let your follow the (near) live radar screens as the storm approaches. If you don’t have one, add one to your phone.

Camera Settings

Now you have your gear ready, your location selected and your weather safety planned. Here’s the easy part – let’s learn how to shoot lightning!
I recommend starting with one setting and seeing how that works and then tweaking it if needed. Here’s how most of my shots are taken:
Shutter Speed: 15 seconds
Aperture: f4
ISO: 100
White Balance: Incandescent / Tungsten
Focus: Manual
Image mode: RAW
Shutter Speed: You don’t know when lightning will strike, so you want to keep your camera open and shooting for an extended amount of time. I find that 15 seconds works well for me. I rarely overexpose the foreground (which is usually just dark except when the lightning hits) and any street lights in the scene don’t get too bright. Allowing a 15 second exposure gives me enough time to get 1 to 3 strikes in a frame.
Aperture: You can adjust this to try different settings, but I start at a few steps short of ‘wide open’. Most lenses are not at their sharpest at their widest settings, and if I capture an amazing photo of lightning, I want it to be as sharp as possible! If you stop down the aperture too much, you might not let enough light in to expose the foreground enough. Generally in the f4 to f5.6 range should work. But after shooting a while, you will know what works best for the particular night you are shooting.
ISO: When lightning strikes, things get bright! Feel free to use your lowest ISO or near the lowest. Like your aperture, this can be tweaked if needed, but start at your lowest setting.
White Balance: This one took me a while, but I finally settled on using the Incandescent (Tungsten) White Balance setting. First of all, this will be close to what your street lights are putting out. Secondly, I like the rich blues that I get in my skies with this setting.
Focus: Focusing is tough at night, so this should be the first thing you do. Find something in the distance to focus on and then switch your camera to manual focus. After you capture a lightning strike, confirm your focus with the camera’s screen. Adjust as needed and be careful not to touch your lens after you’ve focused.
Image Mode: If you’re not already shooting in RAW mode (as opposed to JPG), you’ll want to switch to RAW for these shots. The reason is that you’ll have more ‘data’ to work with in the image. For example, you’ll have more control over the exposure settings and white balance to get the image looking the way you want it. If you shoot in JPG, you’ll be much more limited.

Using an Intervalometer
One of the great things about digital photography is that you can shoot hundreds of photos and not have to pay for film and developing. When you’re shooting lightning, it’s up to you to get your settings correct AND actually capture the lightning.
The best way to ensure you’ll capture some lightning shots is to shoot a LOT of images. On a single night of storm shooting, I might easily shoot over 500 images. Out of those 500, maybe 30-50 will have lightning on them. Of those 30-50 I might less than 5 that have the lightning in a good location. If this is your first time shooting lightning, any image with lightning will be AWESOME!
Like anything we shoot, the more often we shoot it, the more critical we become. For now, since you’re learning, have fun, stay safe and shoot A LOT of images.
What an intervalometer does is automate the shooting process. Once you’ve set up the shot and are happy with your focus and exposure settings, you can either keep pressing the remote button – OR – have an intervalometer automatically shoot an image every 20 seconds.
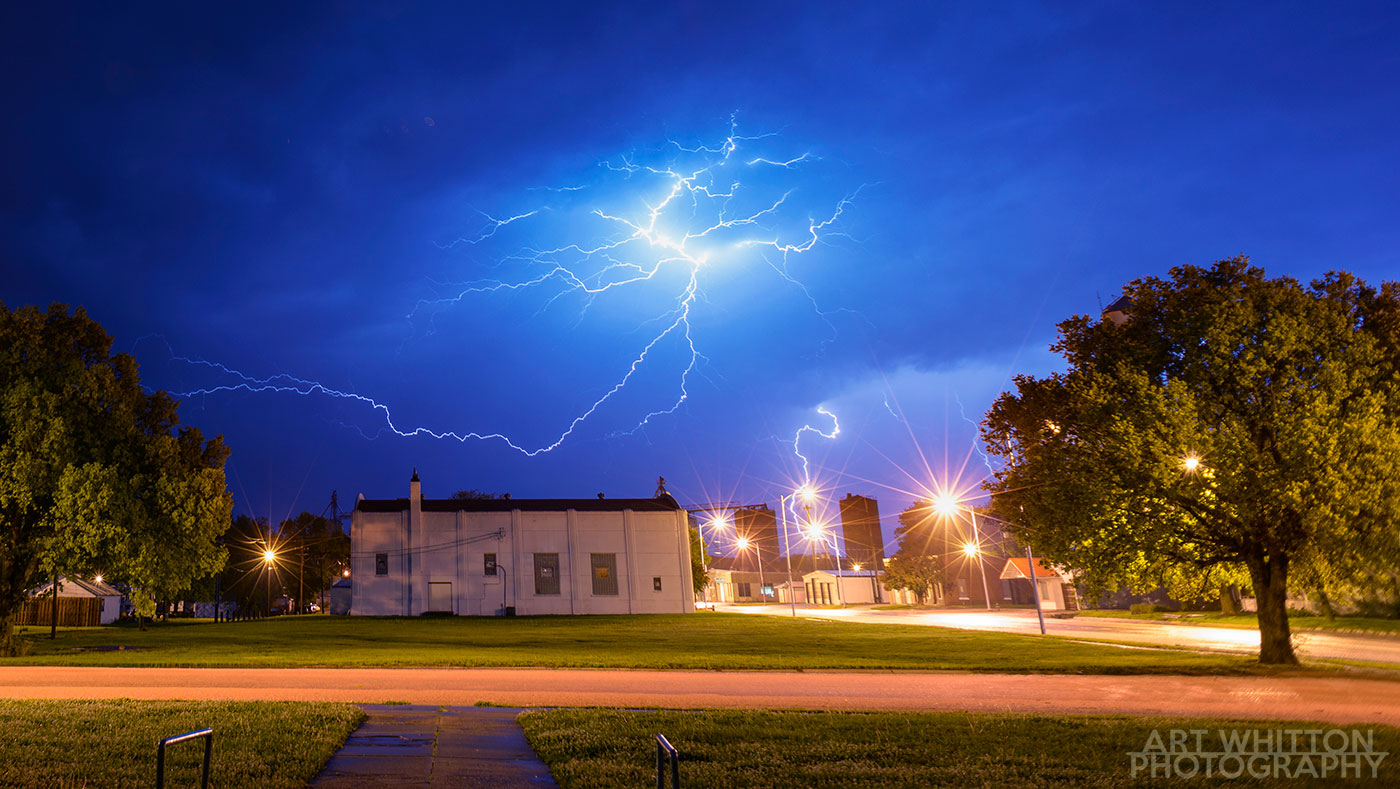
Last night, my camera took this photo while I was on the couch watching HBO. Isn’t technology wonderful? 😀
Your camera may have an intervalometer built in, or you may want to get a remote that incorporates one. Read up on your manual and see how it works.
Note: If you do set your camera up and use the intervalometer, remember to physically check your camera from time to time as wind and rain can shift. Your lens might have rain spots that will ruin the image, or your camera might be getting soaked while you’re cooking dinner. Also, check your card capacity and battery charge occasionally.
Processing Your Image
With the settings above, you shouldn’t need to adjust your image much from what the camera shot. Here’s a typical image straight out of the camera (SOOC).

It’s a decent shot, but there’s a few things I would do it. I would adjust the perspective a little, lighten it somewhat and possibly add some contrast to the sky.
Here’s a tutorial from my Photoshop site to show how distortion from wide angle lenses can be corrected: LINK
This tutorial will give some pointers on adjusting exposure: LINK
Finally, here’s a short video that shows how I typically edit a lightning image:
Thanks for reading. If you have any questions you can email me at art@artwhitton.com or leave a comment below. If you liked this post, please share it with your photography friends and show them how to shoot lightning.
Stay safe, have fun, get great shots!