Introduction to Photographing Water Drops
I’ve been looking at photos of water drops since before I first starting taking photos. I’ve been intrigued by them since I first saw this classic image by “Doc” Edgarton. He used a special strobe he designed to freeze the moment the milk hit the surface and formed a crown.

Well… 40 plus years later I finally got around to trying to take a similar image. I scanned over some online articles and started experimenting (playing).
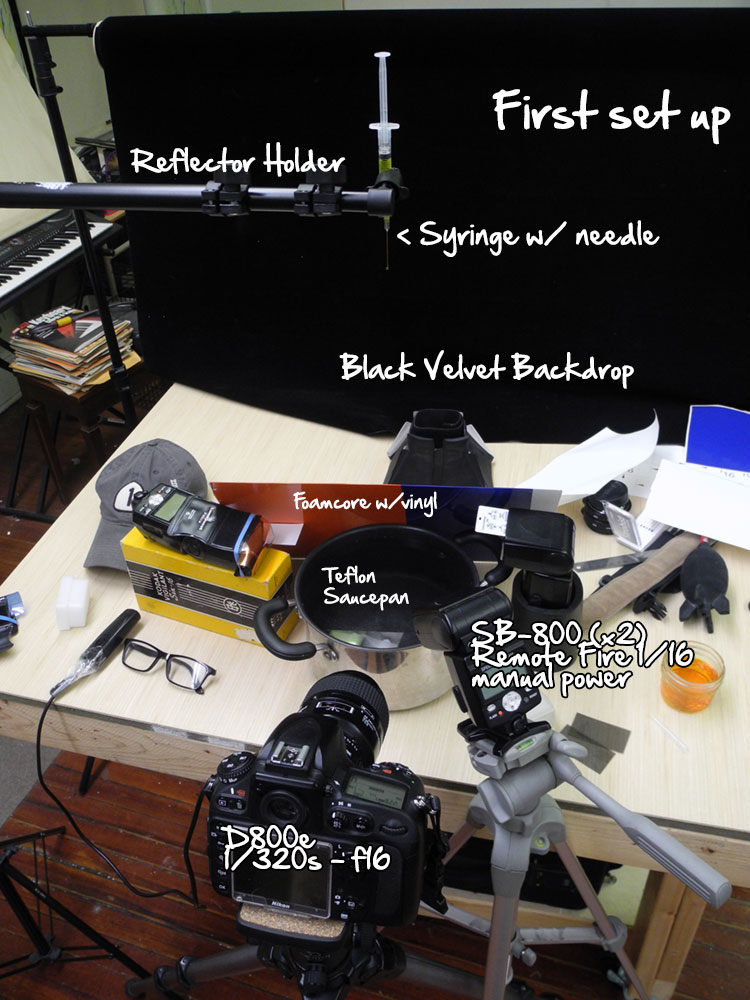
First off, to freeze the drop, you need to have either an extremely fast shutter speed or an extremely fast burst of light. Thanks to the modern flash units, I can easily get a fast burst of light. I have 3 Nikon SB-800 flash units and found that on manual, their speed varies as follows:
1/1050 sec. at M 1/1 (full) output
1/1100 sec. at M 1/2 output
1/2700 sec. at M 1/4 output
1/5900 sec. at M 1/8 output
1/10900 sec. at M 1/16 output
1/17800 sec. at M 1/32 output
1/32300 sec. at M 1/64 output
1/41600 sec. at M 1/128 output
I had to find a balance between a short burst and getting enough light to light the scene. It turns out that a manual setting of 1/16th power was just right. This freezes the action at 1/10,900 of a second (which is almost fast enough for what I needed).
Important Safety Note: Please be aware that water and flash units don’t mix. Flashes carry a vary high charge, so don’t get them wet!! Please be careful of your equipment when photographing water drops.
Now that the flash setting was picked, the easy part was setting the camera. I selected the fastest shutter speed I can sync with the flash (1/320s) and worked with the aperture until I got the lighting I wanted (f/16). I started shooting at ISO 100. Without the flashes, this exposure results in a totally black image. You want to keep outside (non-flash) light from affecting your image so only the light occurring at 1/10900 second will light the scene.
Focus can be tricky with these shots. Depending on your lens and setup, you might be close to the subject and have limited depth of field. With a small depth of field your focus is critical. I put my camera on focusing rails which helped a lot with this. My method of focusing was to place a pencil at the point where the water drop hit the surface and then focus on the pencil. It’s easier to do if you have an assistant, but you need to be careful not to move the pencil. Once I had a good focus point, I could use the rails to move side to side to center the drops, or move forward and backward to correct focus if needed.
You may find (like I did) that making these settings is the easiest part of the whole exercise. If you set up a container (bowl) and drop water into it and release your shutter at the correct time, you can start getting images now.
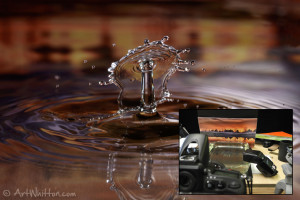
I used a syringe and first tried with the needle still in it, but found that the drops were too small (or smaller than I wanted). To hold the syringe, I used my reflector holder that I had in my studio – it held the syringe perfectly – but wasn’t as stable as I would like. If I did this all the time, I would build a rig for this. You can see the rest of the set up if you click on the image to the left. The saucepan, flash position and everything else should be fairly straightforward. I used my D800e with a Nikkor 105mm Macro lens – and added a 36mm extension tube. Below is a shot from my first series.
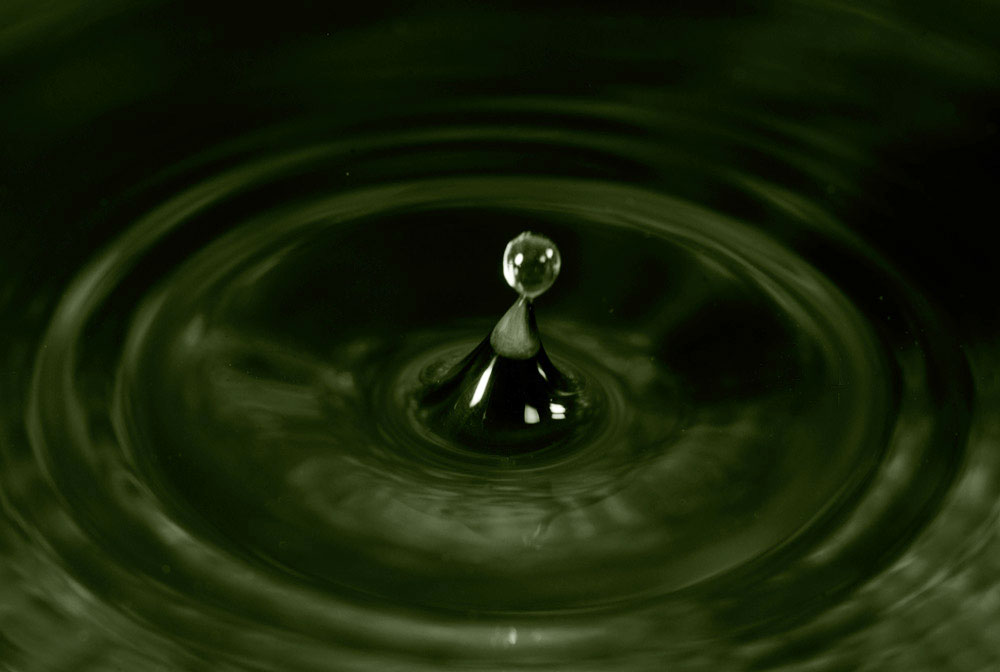
As you can see, it’s a photo of a water drop, but not a very dynamic one. It showed that I was on the right track, but more work was needed.
My next thought was to add some colour to it. I found some orange vinyl and put in the background so that it would reflect on the water.

Ok – that’s a little more interesting, but I’m looking for something less monochrome. For the next series, I added orange and blue vinyl to a sheet of foam core and put that up as the background.

Another thing I tried with the photo above was adding food dye to my drops – you can see a slight yellow tint in the drops from this. After a while, it made the water yellow, so I stopped with the food dye. I like this one above as the blue and orange change sides with the reflection. A good start and something to build on.
At this point, I was deciding that perhaps my container wasn’t the best choice. I was using a black saucepan with the idea that it would absorb any light and give a richer tone. So my next thought was to go with a clear bowl.
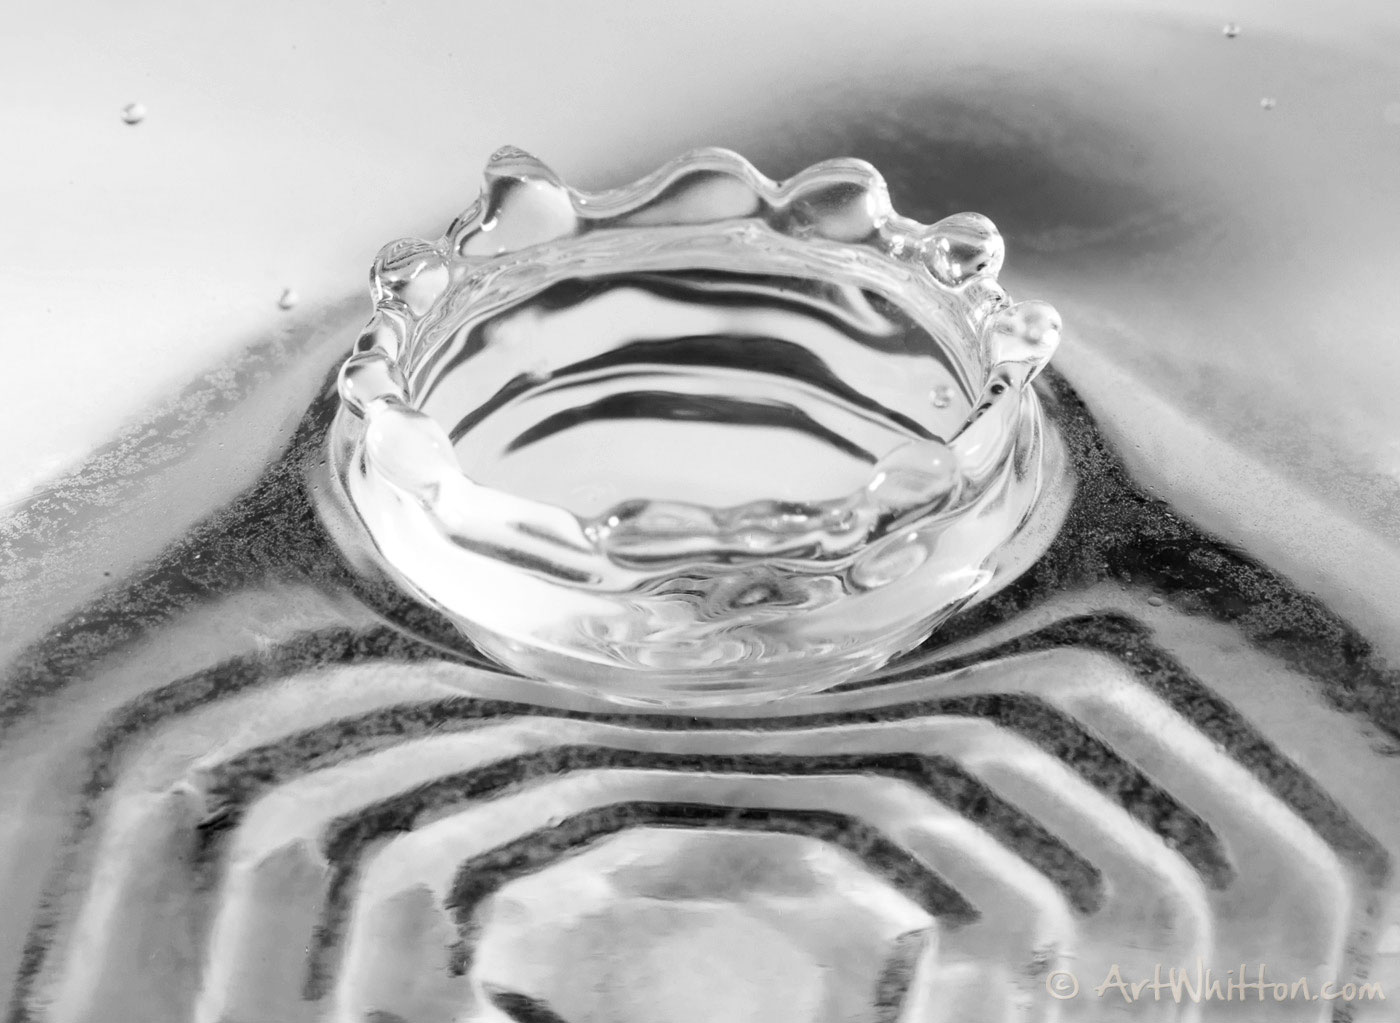
This is a different look and gave me some ideas. I decided to add some colour by putting my orange / blue foam core under it.
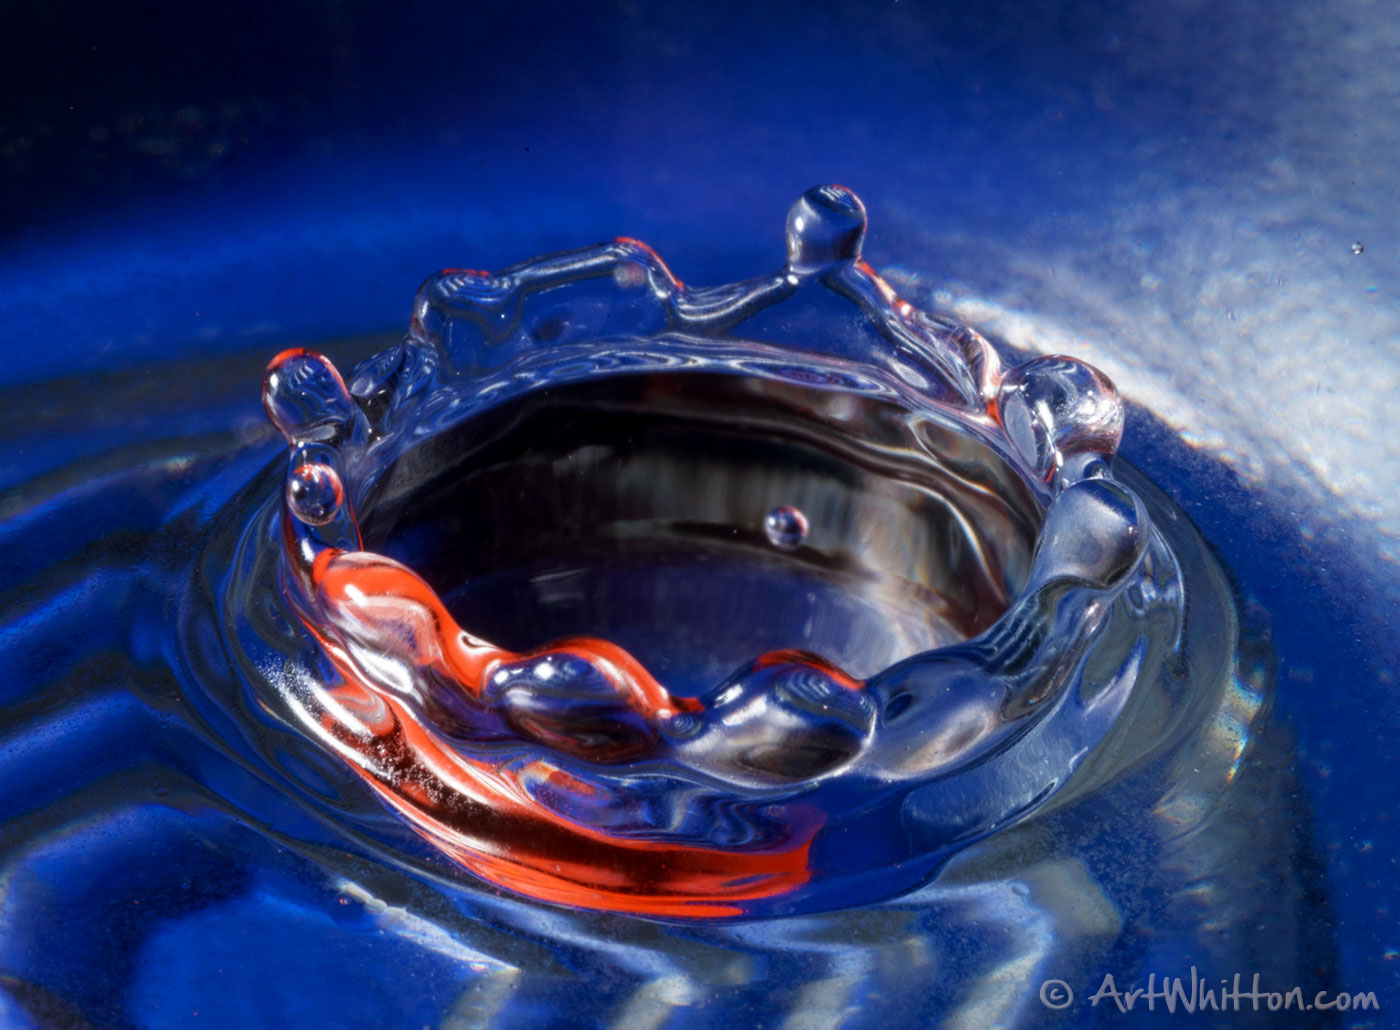
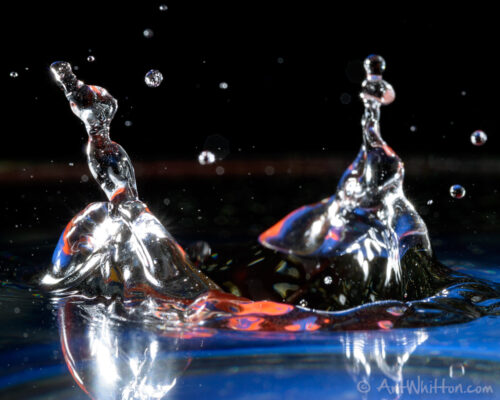
Ok – now we’re getting somewhere. Time for a larger bowl and this will allow me to try a lower angle and see if that works. So here we are with a clear bowl, blue/orange base under it and black background.
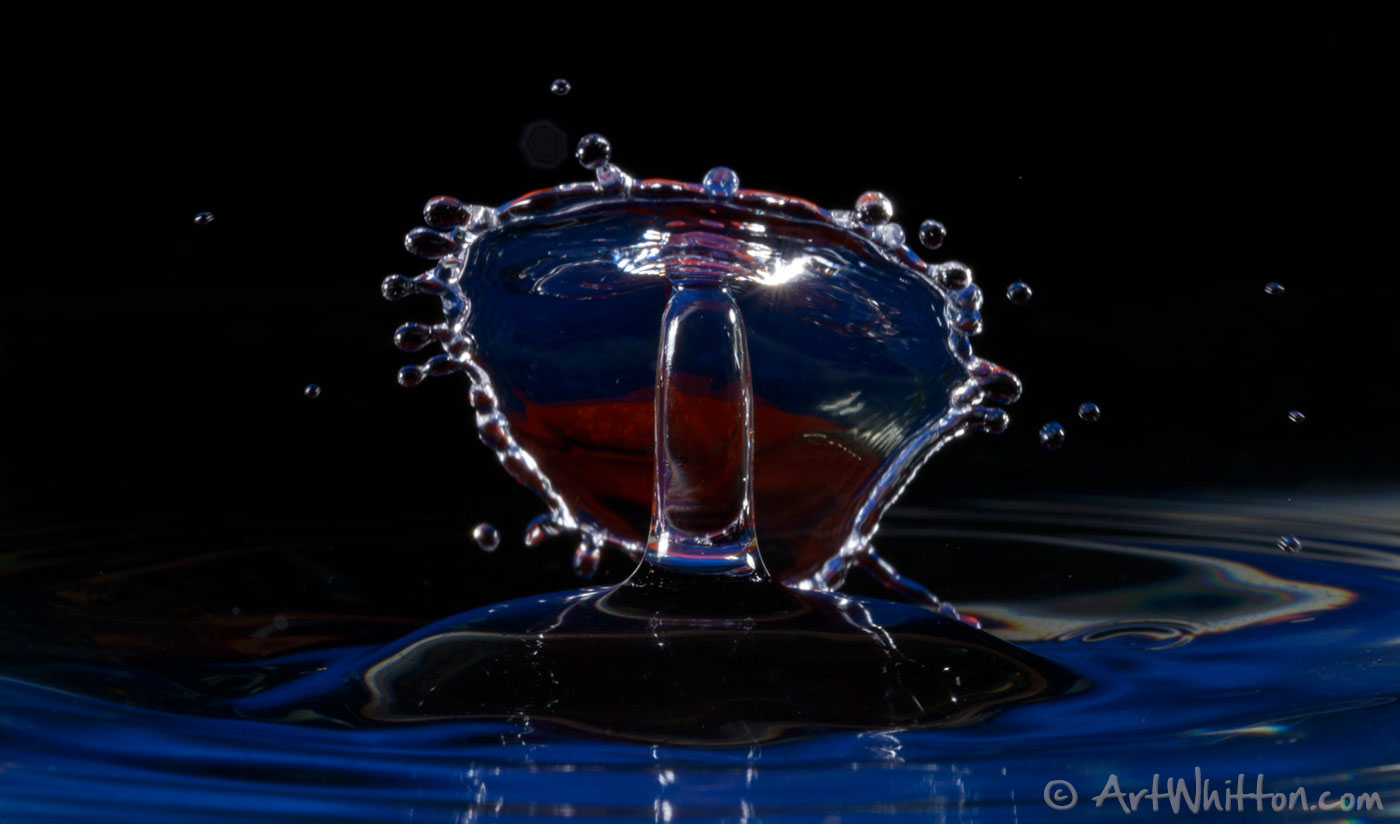
Finally! 😀 Now I’m happy with the setup and I captured a neat splash as well! This is after about 400 shots and 4 hours of trying different things.
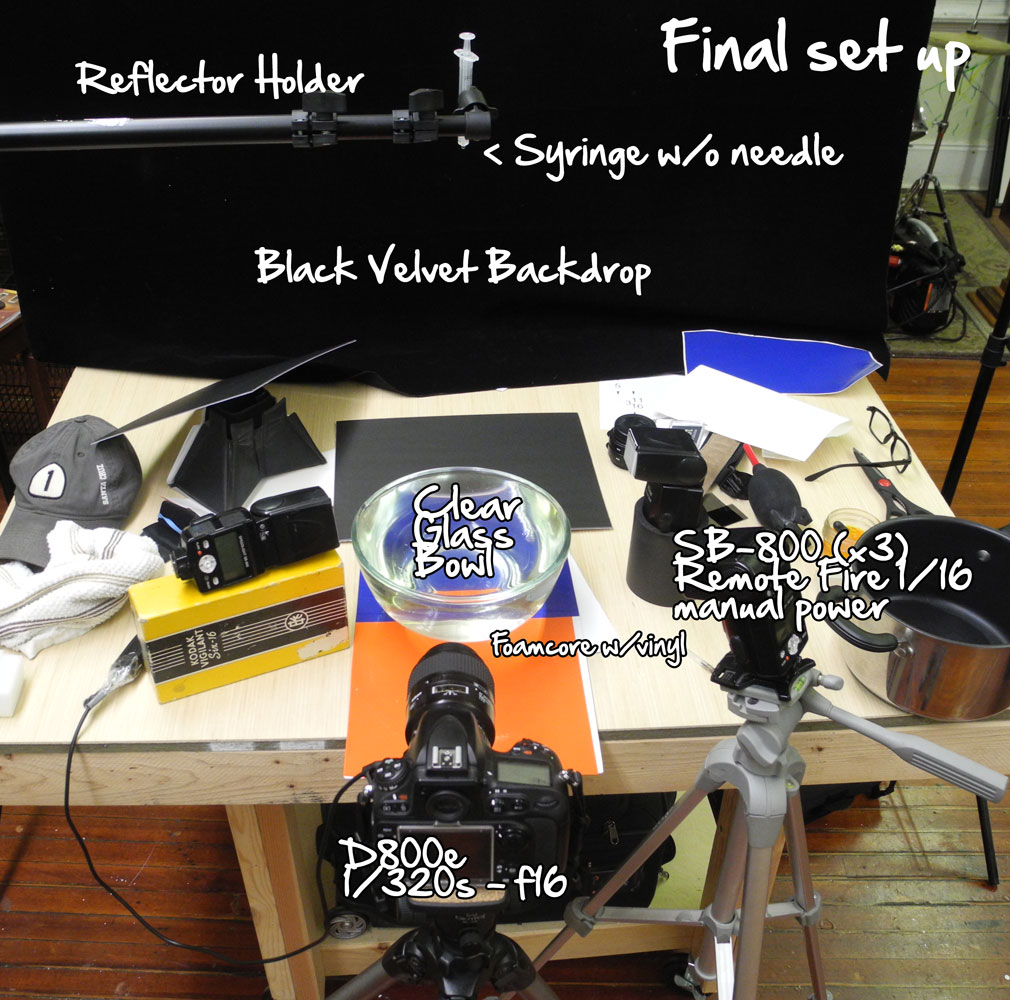
This is my final set up. I’ve also tried moving the flashes around and different powers and apertures, but this is pretty much how I shot the rest of my images in the gallery at the bottom of the page.
Adding the colours under the bowl really helped and the black background makes the water ‘pop’. Shooting at a lower angle gives a better perspective (in my opinion).
Of course, timing is everything – remember you are only capturing about 1/10,000 of a second, so you’ll end up shooting a lot to get a drop or splash that you like. I’ve shot over 600 photos now since I started and only had one drop like the one above with the ‘halo’. It’s like shooting lightning – you never know what you’re going to get!
It’s fun, it’s tricky and depending upon your personality – it can be addictive!
If you have any questions, please post them below or email me. Thanks for reading. Here’s a link with some more info and great inspirational images if you want to get more involved: LINK
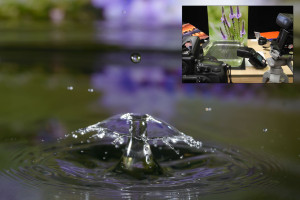
Update: I was ready to move on but decided to take more shots and try a couple of new ideas. I went with a shallow glass baking pan with black matte board under it. Then I added various photos behind the scene to reflect in the water. I really like this and now have more ideas to play with! Note the differences in tone and color when the image is changed – you can even move the background a little bit to get new results.